Our farm name is Conser Run Farm named after the stream that runs through the middle of the farm. We currently raise grass fed Angus cross beef and pasture raised pork for direct sale to the end user. We are always looking for more customers and new friends. If you are interested or have any questions please feel free to ask! Either leave a comment or email us through our social network account.

Sunday, March 30, 2014

New cows, a new heifer, and a new little baby bull!!!

The only way March could end any better is if I found a morel mushroom tomorrow!!!   I brought home two more momma cows to add to the herd on Friday morning as well as a new heifer.  All are ready to be bred and if they get bred before the end of April they will have calves in January.

The first two are mainly Black Angus.  I do not have their pedigree information yet but should have it soon and once I do I will update everyone.

Our two new Angus cattle

This good looking girl is a shorthorn heifer.  I am really excited as she will be my third Shorthorn in the herd.  The first was Sally and her daughter Frosty was the second.  The shorthorn breed crossed with my Charolais x Angus bull produces an awesome steer that grows fast and has great flavor and lots of meat!

My new Shorthorn Heifer
So, since the snow we got last night melted and it was brilliantly sunny with temps in the upper 40's I got everyone on the four wheeler for a cruise around the farm.  We haven't done that since early in the fall last year because of the cold and I wanted some time with everyone to do that.  It was well worth the trip.  As we were finishing up our ride I came past the gate on the other side of the creek and saw Chilli over in the rose bushes.  As she turned around I saw a little calf just trying to get up!  We checked her out to make sure she was all good to go and then checked to make sure the calf was good as well.  It is a little bull.

Black Angus Dam, Charolais x Angus Sire  =  Gray Bull Calf!

So, after we walked around the pasture for a while I took everyone else up to the house and then headed back out to give him his ear tag.  I am going to be very diligent this year in getting the calves tagged quickly and taking a picture of the mother and baby with the tags showing in the photo so I don't mix them up any more.  I have already mis-matched a couple in the computer and then I am not sure if I got them right in the end.  This should eliminate that.  Needless to say, as you can tell by her looking at me in the photo, she was not happy I was there and was pretty clear about that.  She didn't push me away but was very close the entire time I checked him out and gave him the tag.  Once I left she calmed right down and went back to feeding him.

Our newest Angus x Charolais bull calf
After getting the new guy his ear tag I went over to check on everyone else.  The entire herd short of Princess was here soaking up the sun!  If you zoom in you will see Legacy's little girl Erica standing by her momma in the center of the photo.

The cattle soaking up the warm spring sunshine.
 Last year I had the idea to take a photo showing the changes in the farm during the transition from winter to spring.  I should have started sooner when there was snow on the ground but this will do.  The grass has grown about 2 inches since Friday morning.  I think spring may actually show up and stay now....we can only hope!

Looking south over the farm. March 30th
So, I came in the house tonight for supper and as I was sitting down looking out the kitchen window at the large tree by the drive I got a great idea.  I was thinking back to watching the kids play in the tree earlier this week and how much fun they were having.  Well, my idea grew from that and I have decided I want to build them a tree house.  I always wanted one as a kid but never did.  So, I want to give them one.  I am going to try to get it done before the customer party but I am not sure if I can make it.  I am going to have to rustle up some help if it is going to happen that fast!

Future site of tree house!
So, in closing we now have two new calves this year, one heifer, and one bull.  That is two down and 14 to go!   It is going to be an awesome year I can feel it.

Kenny

Monday, March 24, 2014

Business trip to Colorado!


Good morning everyone!  I am back home now from a Business trip to Colorado for the PLANET Student Career Days at Colorado State University in Fort Collins Colorado.  It was an awesome trip and I took around 400 pictures.  I picked a few of those to show you some of what I saw and did.  

I was lucky enough to get my favorite seat on the way there and the way back, right by the wing.  I get motion sickness if I am not careful.  I am learning to control it but I still get it.  By being able to see the wing and surroundings I am able to control it.  Plus, I get to see some pretty cool views of the ground if it is not cloudy.

Window Seat on Southwest Airlines

We got in pretty late the first day so we ate and went to bed.  The first full day was beautiful.  Perfectly sunny and a warm 65 degrees.  We decided to head to Golden Colorado to tour the brewery that makes my favorite beer, Coors Original.  This is the view from the parking lot!

View of mountain from Coors parking lot, Golden Colorado 

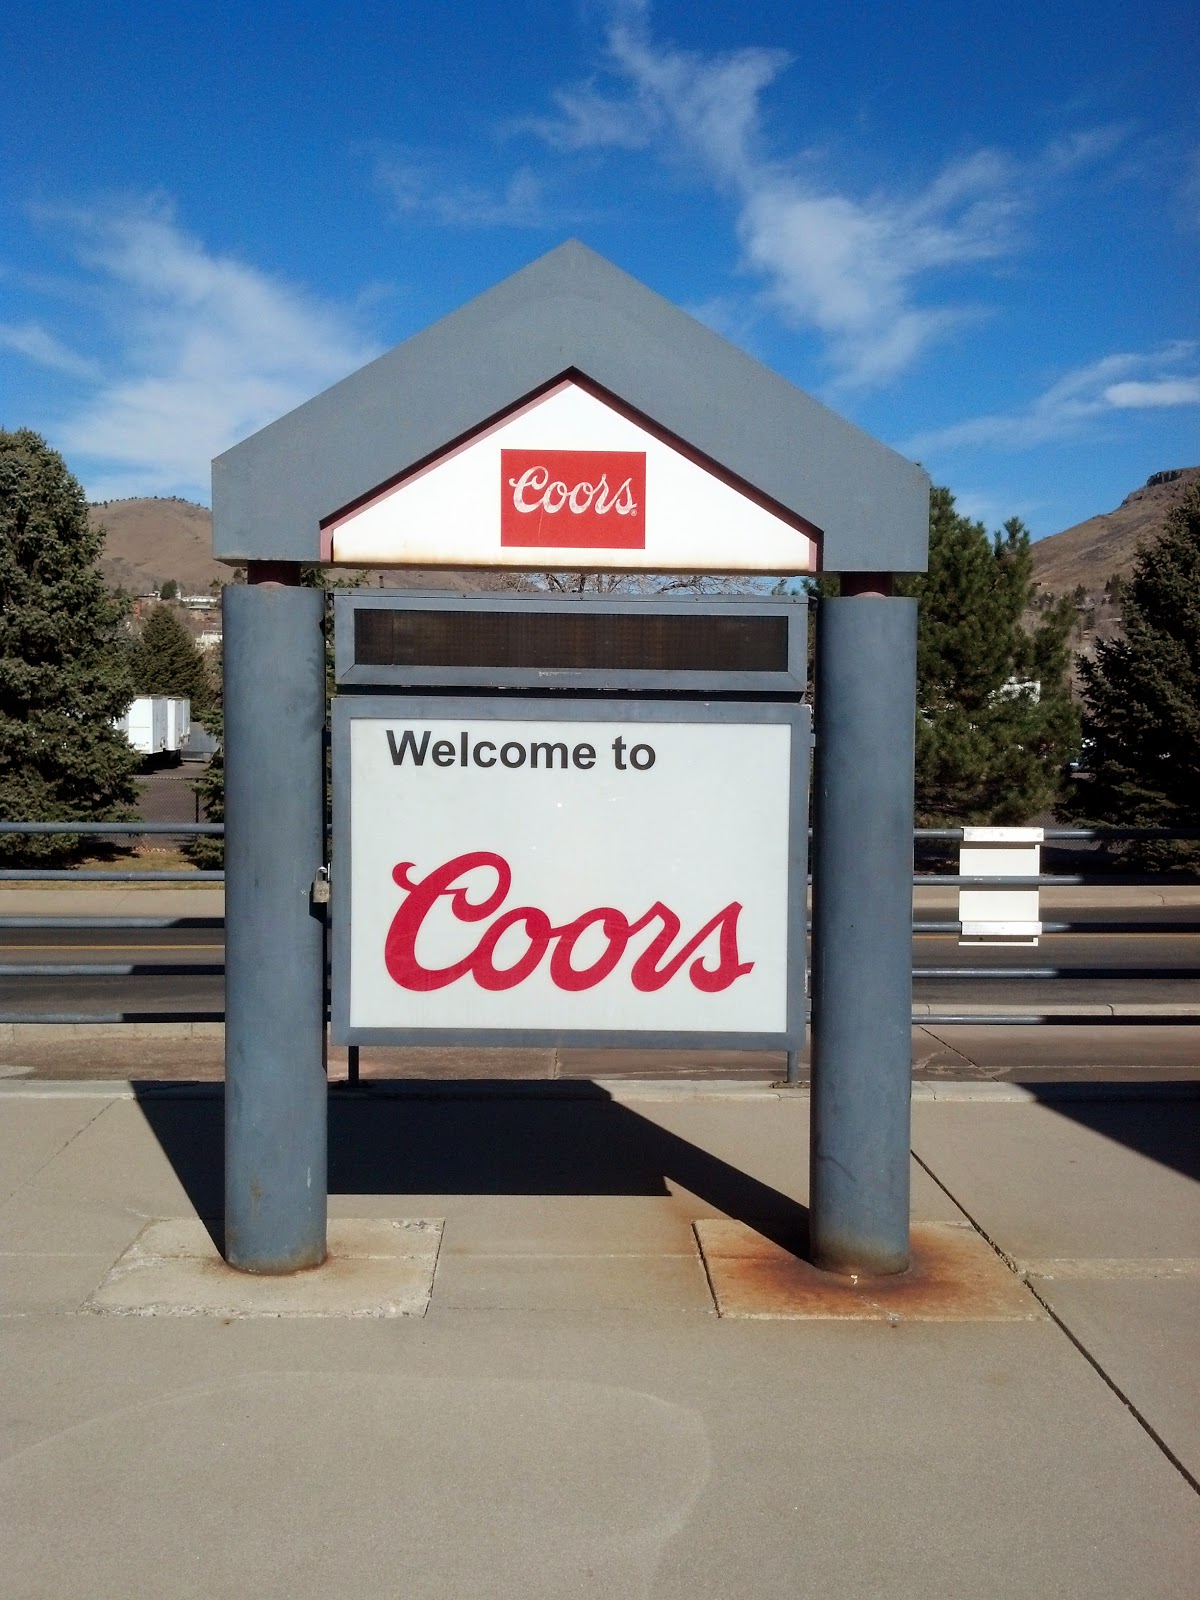
Here is where the tour starts.  You get a free tour of the town of Golden and the brewery itself.  I think they need to repaint their sign though, it is getting a little dull!


Here is a picture of the large copper pots where they brew the beer.  The tour is informative but you are limited on what you are allowed to see, most likely due to safety concerns and proprietary processes.

Large copper pots at Coors brewery Golden Colorado 
Next stop on the tour was the Quality Control Lab....I want that job!

Quality Control Lab at Coors Brewery Golden Colorado 
The best part of the tour was the free samples at the end!!!  I had the Colorado Native.  It was awesome!  Only problem, you can only get at the brewery in Golden, no where else.  If I could get this at home I would have a full keg.....I gotta find a way to get this.   May need to give the Bandit a call and have him make a run with me!

Sample of Colorado Native at Coors Brewery Golden Colorado
 And who could leave without a picture by the large copper pot at the end of the tour!


The main purpose for our trip was for recruiting some great talent from the competition!  There were almost 60 schools with almost 800 participants.  Much bigger than when I competed back in College.  Some of the competitions are the same and others have changed and there are some new ones and others have been discontinued.

There is a huge Job fair at the beginning of the entire event.  Even when I was in competitions it was great to come home with some cool "Swag" and nothing has changed since then.  So, we took some cool handouts with us to get their attention and draw them in.  We also had some great info about the company and what we do and what we stand for.  I was a great feeling to get to meet a lot of great talent and hopefully get to have some of them as coworkers.

Enviroscapes Job Fair Booth at 2014 PLANET Student Career Days
After the job fair the Students all had briefings and training meetings so we had about 6 hours before the sun set to go visit some where.  My coworker and I both wanted to see the Rocky Mountain National park even if we didn't have time to walk around.  I really have no words to accurately describe the views.  Breathtaking, mouth gaping awesome is as close as I can get.  What is even more amazing is that on September 11 & 12 of 2013 this area experienced a 1000 year flood.  That means a flood that happens at most once in 1000 years.  Most of the road we were travelling was washed away and access to a lot of people and places was lost.  They just opened the road back up officially a month or so ago and there is still a huge amount of work left to do.    If you want to learn more about the flooding and the aftermath Google search  Big Thompson Flood and you will understand the extreme scale of what happened.

Entering into Big Thompson Canyon in Colorado
 Along the way there are many pull offs for you to take pictures.  I stopped more times than I can count.  There is still not a picture anywhere that will do the scenery justice.  It is hard to believe this is even real until you experience it in person and can touch it.

Big Thompson Canyon Rocky Mountains, Colorado
 We made our goal!!  We reached Rocky Mountain National Park and headed on into Estes Park from there.  I have always dreamed about getting to see this in person but never though I would actually get to do it.
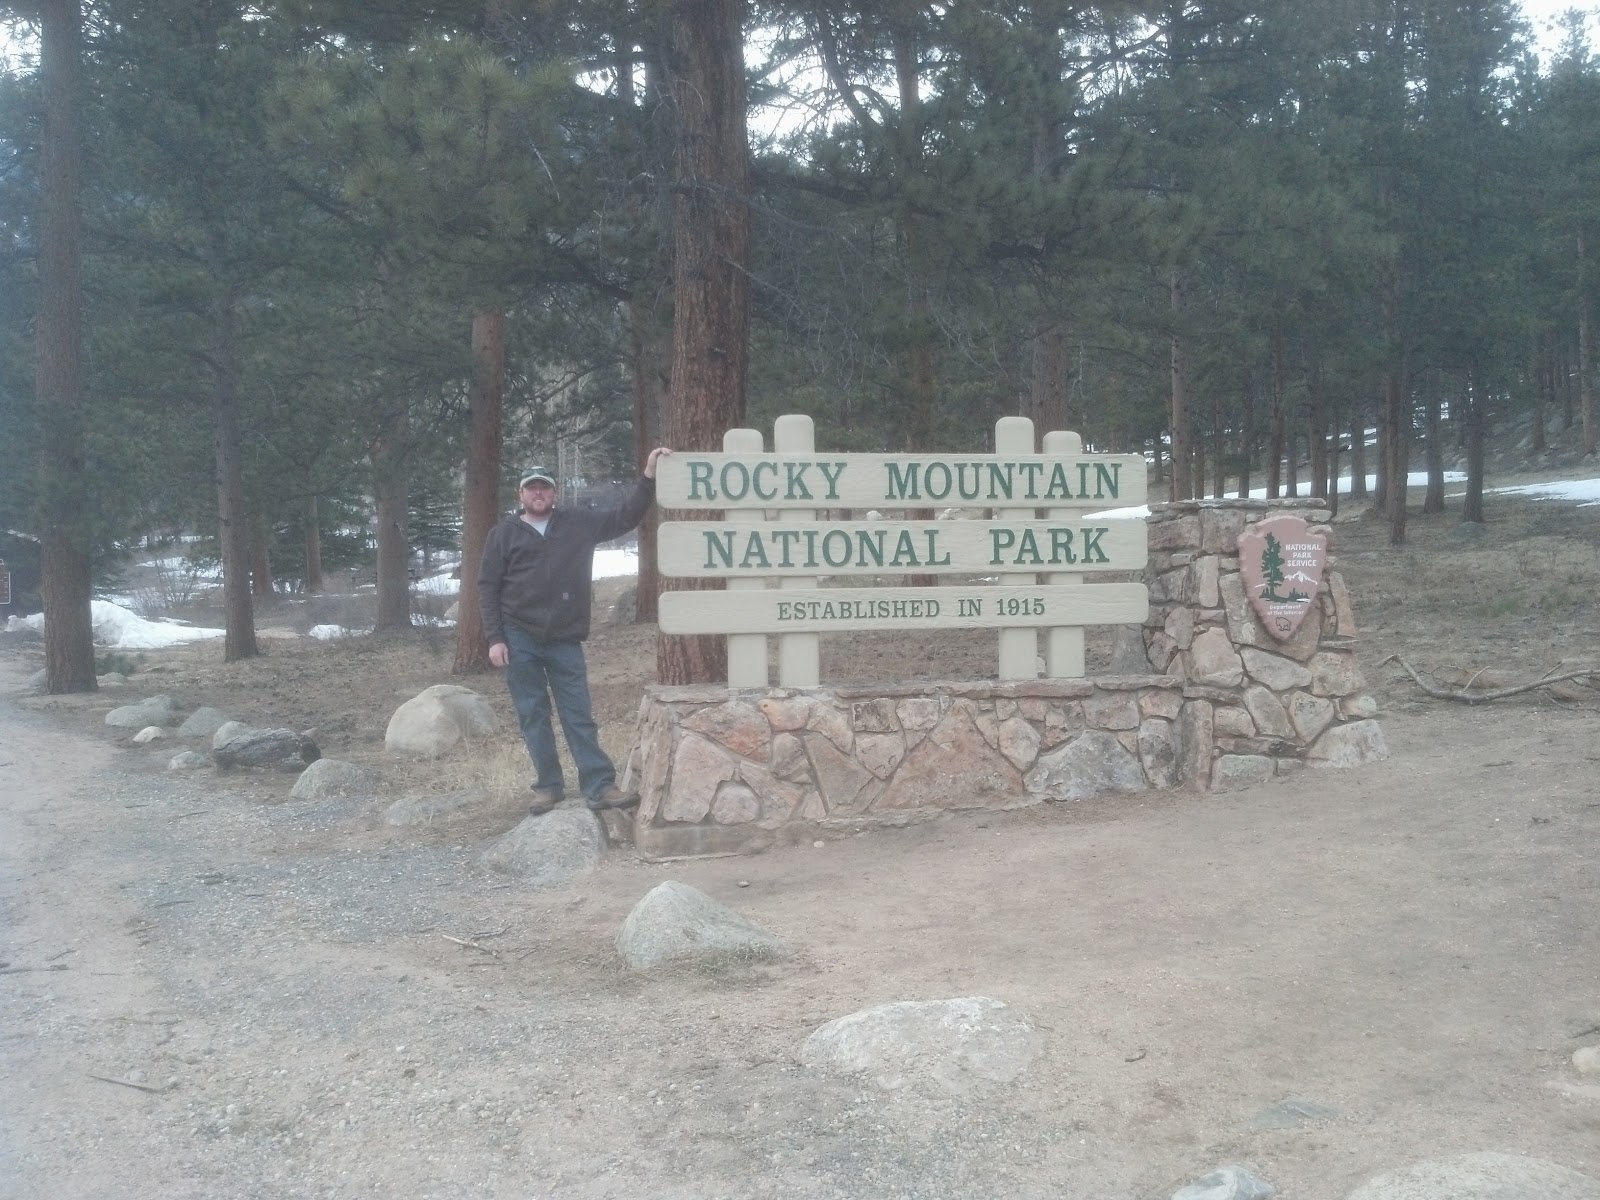
Entrance to Rocky Mountain National Park on Rt. 34 in Colorado
 Along our way we saw some wildlife.  Here was one of many elk we saw along the road on the side of the mountain.  We also saw mountain goats as well.

Elk in Rocky Mountains
 Something else that I new existed but have never gotten to see till now was trees growing in nothing but cracks in solid rock.  I would estimate that some of these trees were extremely old as they are very slow to grow due to the limited nutrients available to them.

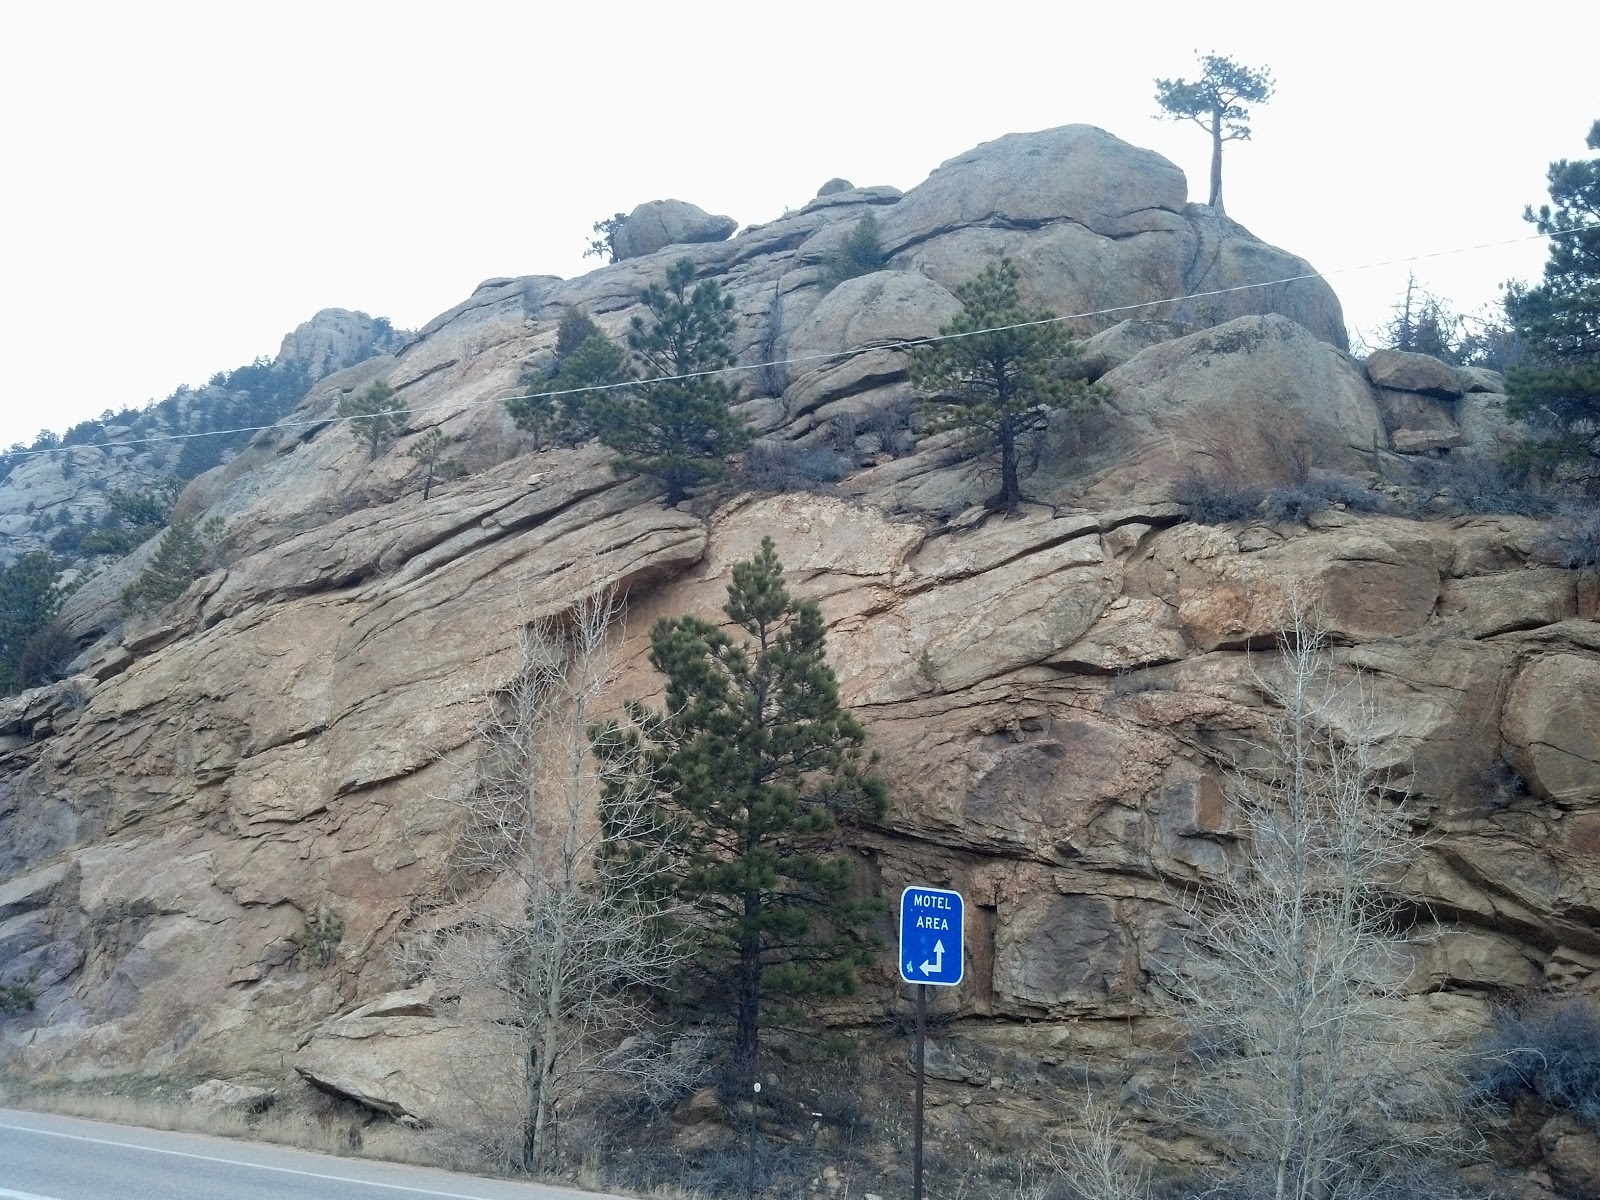
Tree growing in solid rock, Rocky Mountains, Colorado 
There were many many many stops to take pictures.  This is one of those showing just how extreme some of the rock faces are.  So amazing!

Big Thompson Canyon Rocky Mountains, Colorado
 Another thing that was mind blowing is all the stuff I didn't see on the way in because I was looking from a different angle!  I also stopped to get a picture of some of the boulders that were washed down the river in the floods.  In the first two pics the boulders look big but not that big.

Boulders in Big Thompson River Rocky Mountains, Colorado
 Here is a perfect example.  These boulders looked big from the road but looked like they might be the size of a very small car.  So I took a picture and then climbed down to stand on them for a size reference.

Boulders in Big Thompson River Rocky Mountains, Colorado
 Here is me standing on the same boulder.  The boulder was half the size of my house.  Literally, if put the three large boulder in my house it would fill it from end to end and top to bottom.  Unbelievable!!!  These rocks were also not here originally, they were washed down from upstream during the flood.  Imagine the force it took to move a boulder that probably weighs 100 tons!  Not to mention the grinding effect of all the debris in the water just sand blasting away at everything it touched.

Boulders in Big Thompson River Rocky Mountains, Colorado
 A couple more pics on the way back down the canyon.

Big Thompson Canyon Rocky Mountains, Colorado 
Here is another size reference.  If you pull up the picture to full size you will see a very large excavator sitting down by the river that they are using to clean up and rebuild everything.  During the flood the water was so deep that it was over the top of the road and in a lot of places the road was completely washed out and carried out of the canyon.  That is a massive amount of water!

Big Thompson Canyon Rocky Mountains, Colorado
 This was a picture after leaving the canyon showing some of the Foothills.

Big Thompson Canyon Foothills Rocky Mountains, Colorado
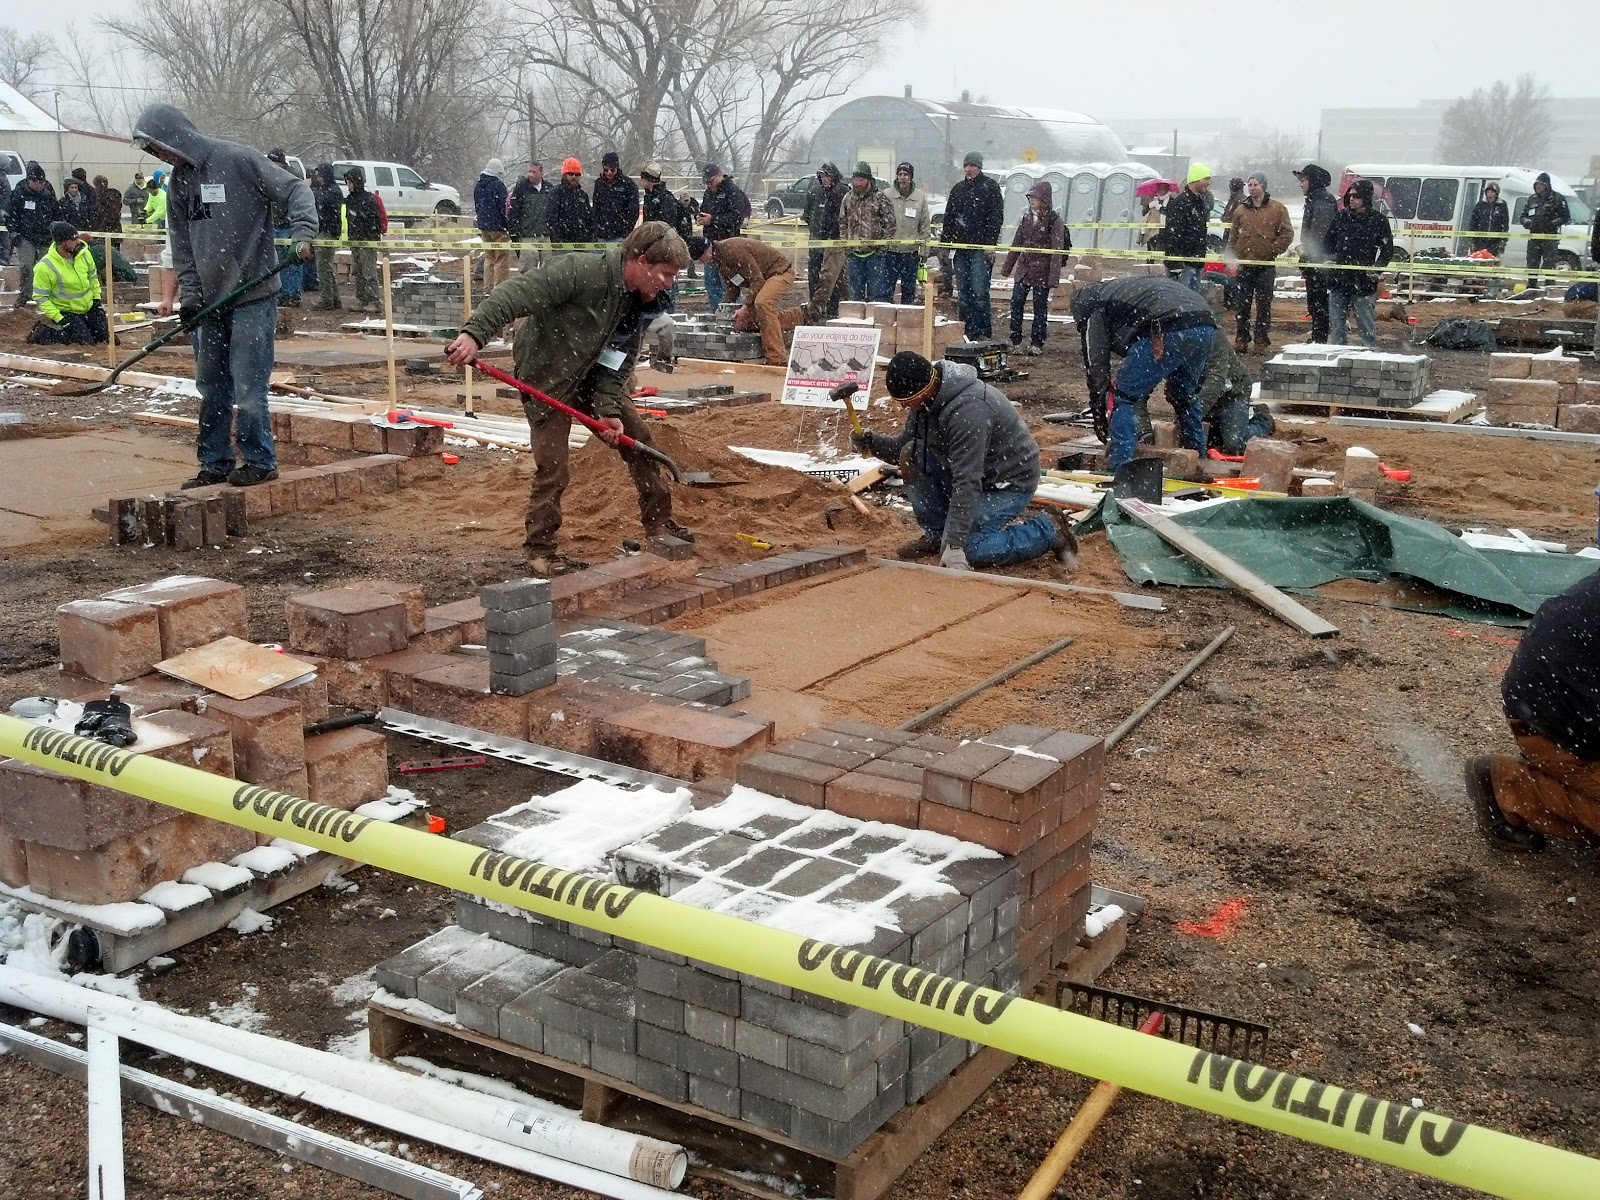
 Saturday the weather decided to be very very cruel!  Unlike the sunny 65 degree weather we had the first two days Saturday was 25 and snowy.  I wanted to show some pictures of the competitions.  It was quite different to be on the outside looking in.  A lot of times I wanted to jump in and help but all you can do is watch and hope they figure it out!

Hard-scape installation is a staple to any landscape competition.  The cold just makes it more realistic!

PLANET Student Career Days Competitions
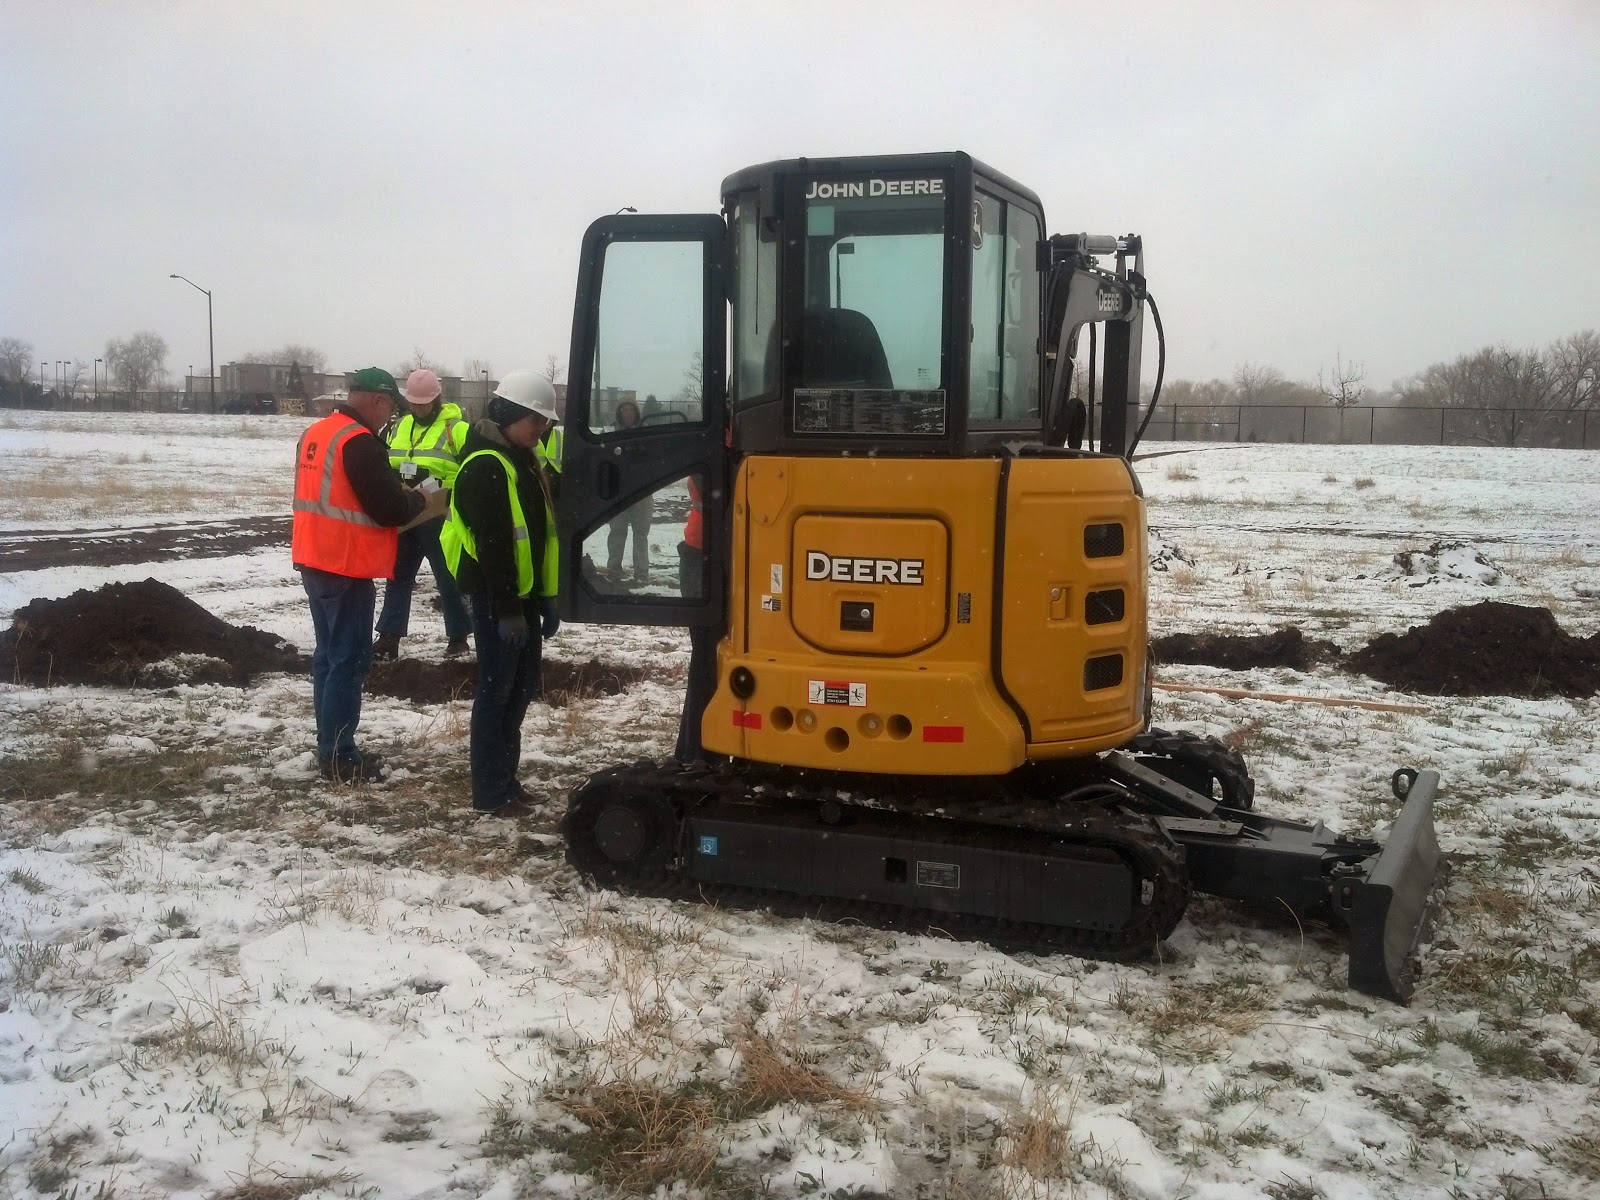
 This is a new one.  There was very little equipment operation when I competed.  Just lawn mowers, truck and trailer, and skidsteer.  Now there have added backhoes and Excavators to the competitions.

PLANET Student Career Days Competitions
 Here is one of the Ohio State University Agricultural Technical Institute (OSU/ATI) students getting ready to compete in the excavator.
PLANET Student Career Days Competitions
 Here are a couple more Ohio State University Agricultural Technical Institute (OSU/ATI) students competing in woodworking.  Even though they didn't get the bench finished before time ran out they still had a lot of fun!

PLANET Student Career Days Competitions
 The last competition for the entire event was Landscape Installation.  There were 60 teams competing all at the same time on this one.  They had music and lots of cheering to keep everyone motivated!

PLANET Student Career Days Competitions
 Again it was surreal seeing the event from the other side for the first time.  I cannot wait to go again and hopefully match some highly qualified students up with their future career in an industry that you have to love to be successful!   I hope everyone there had a great experience as it will be one that they will remember for the rest of their lives!

Before I go I wanted to show some of the awesome items I brought home from the brewery.  I got me a couple of new beer glasses and a belt buckle as well as a shirt and hat combo for myself and my wife!

Coors Brewery Swag!

Coors Brewery Swag!
Well, in my absence a lot of work has piled up again here on the farm.  I am going to take advantage of the frosted ground to clean the barn and spread the manure on the fields where I need it most.  Hopefully the snow storm they are calling for tonight/tomorrow will miss us and we can start to warm up.  It has been a long and very cold and miserable winter, it is time for spring and warmth to come back!

As for Colorado, I will be taking the family there some day once the kids are old enough to hike and enjoy and remember it.  I cannot wait!

Have a great day everyone, talk to you again soon!

Kenny

Friday, March 14, 2014

My truck is finally back home!!!!

Well, I was finally able to get my truck today.  They were not 100% done but the last two items need to come in to finish the project and it may be a week or more before they get the light in.  

So here is the before picture of the truck.  If you look closely you will see the fender is rusted out badly and the paint doesn't match because I had the cab painted all one color two years ago to prepare for the future flatbed.  You should also notice that the front wheel well is closer to the front tire by 4 inches.  There are many other little differences that you can't see but these are some major ones.

2005 F350 Aluma Flatbed installation.  Before picture.

Here is the finished product!  We put 4500# leaf spring packs on the back, offroad FX4 springs on the front, a 2.5" leveling kit on the front, and new brakes on the front and new shocks all the way around. Gearheads coated the frame with undercoating from the cab back.  We will be doing the rest later on this summer once the weather is nice so I can get it clean and do it right.  

2005 F350 Aluma Flatbed installation.

Gearheads also took the broken racing muffler out of the exhaust and straight piped it for now.   This made it unbelievably angry sounding!!!!  I love it .... just don't want to be standing by the side of the road if I am pulling a heavy load as it sound as loud as a semi now!

2005 F350 Aluma Flatbed installation.

Gearheads had to put a lot of time and effort into getting this bed onto the truck.  First of all the B&W turnover hitch held the bed too high to properly line up with the back window or the top of the cab.  So we had to take it out and install a plate style gooseneck hitch.  The flap in the bed still hit the new ball so they had to trim some of the unneeded material of the underside of the lid so it would close properly.

Gooseneck hitch plate cover.
 While they were at it I asked them to put a new trailer plug in the hole in the bed for the trailers so I didn't have to have the cord hanging over the back end of the truck any more!   This turned out quite awesome and makes life so much easier!

Gooseneck hitch with trailer plug installed under the cover
After I saw the truck with the new bed setting on it last week I got to thinking about the fact that I no longer had mud flaps.  So I found some that matched the truck and they put them on for me.  This also took some thought and the guys came up with a genius idea.  They installed mud flap mounts for a semi truck to the frame of the truck to hold the mud flaps at the perfect height!  The only thing missing from this picture is the white LED light that gets mounted in the top center of the headache rack.  It will be wired to the cab light switch and will light up the bed at night so I can see at night when hooking and unhooking the trailers.

2005 F350 aluma flatbed installation
 All the lights on the new bed are LED so I shouldn't have to mess with them for quite a while!  Another thing that they had to do was paint the back of the cab.  Ford found out a while ago that because the bed is mounted so tight to the cab you cannot see the bottom of the back of the cab.....so they just don't paint it.  So the guys at Gearheads applied rock guard to the any area they though would need it and then perfectly matched the paint up with the rest of the cab.  No masking lines or different shades of paint....just perfect match!

2005 F350 Aluma Flatbed installation.


2005 F350 Aluma Flatbed installation.
Here is another thing the guys at Gearheads did that I don't think may people would have been able to or wanted to do.    I have seen a lot of flatbeds that when done had the fuel inlet just stuck onto the bottom of the bed.  I did not want this as my first flatbed truck had this and it was a pain in the ass to fill it up.  The inlet was too low and the fuel had to go over up and over the frame to get into the tank so it would blow out at you while trying to fill it.  

In trying to avoid this I asked the guys if they could install the fill cap into the corner of the bed.  This was not an easy task and took some skill and work but it turned out pretty sweet.  It also hides it so it is not a focal point like it would be hanging under the side of the bed!

2005 F350 Aluma Flatbed installation fuel inlet.

I put this picture in so you can see how little the bed hangs out past the sides of the cab.  I was very particular about not having a bed that stuck out past the cab as I did not like that about my old truck.


Some of the many many other items the guys had to fix were all new brakes on the front, right front hub was shot, new u-joints front to back, oil and filter change, and a bunch of other little items.  I still need to replace the back rotors, pads, calipers, and wheel seals.  When I have it back in to undercoat the front frame and the cab I am going to have them drop the carrier bearing a little to try to get rid of the rear end vibration.  

After all that I should be good for a little while!  I know I put a lot of money into this truck but when compared to the cost of a new one that is comparable to this one I have barely equaled a years worth of payments for a new truck.   The best part is that this one is just how I want it.... I just have to take care of it!

I will post some picture of it hooked to the flatbed trailer next week when I have it loaded with scrap.  It looks great.

Here is the link to the quick video of how it sounds!  Drive by with 4" straight pipe!

I want to say a huge thank you to Scott and Mike at Gearheads Garage in Louisville Ohio for their great work and for putting up with me during the process!  I look forward to working with them again in the future!

Have an awesome weekend everyone!  


Sunday, March 9, 2014

Truck project is coming along...hopefully getting my baby back on Tuesday.

Here are some pics I took at Gearheads Garage when I went to check on the progress of the flatbed installation and to make some decisions so they could proceed.  We had to change out the B&W hitch that I had on the truck to a standard welded plate hitch.  By changing the hitch out we are able to set the bed down on the frame lowering it about 1.5" and making it all work out perfect with lining up with the back windows and body lines.  

The first picture was without the sides.  The bed was resting on the truck lift so we could line everything up and make our decisions.

2005 F350 6.0L Aluma flat bed installation and lift kit.

You will not notice till I post a before and after pic of the truck but the above picture has the front end lifted about 2-2.5".  This will level it out when fully loaded to match all the lift from the new rear springs.

We put the bed sides on to see how they fit and what it will look like when all done.  They are going to plug the hole in the top center of the back of the cab for the third stop light and add a new white LED light to the center of the headache rack for lighting up the bed at night.


The guys also have a paint shop and did an awesome job on painting the back of the cab.  I will post those pics later once I have them.  Ford decided to save some money by not painting any portion of the cab or bed that was not visible once the truck was fully assembled.  So, once you take the old bed off the back of the cab needed repainted.  They put rock guard on most of it to protect it from flying debris and touched up the rest to make it perfect.

2005 F350 6.0L Aluma flat bed installation and lift kit.

2005 F350 6.0L Aluma flat bed installation and lift kit.

I went out in the pasture to check on my new calf and noticed some major changes in the creek this winter.   The straight part of the creek where the pigs played in the mud with the kids last summer cut through completely this winter during the major thaw.  This stopped the water from flowing the way it has for the last few centuries and now the creak bed is exposed where it wasn't in the past.


The spring stream from between the fields across the creek still dumps into the old creek so there will still be water there....just an entirely new ecosystem!


I wanted to let everyone know that Legacy's first calf is doing great and is actually very friendly.  She will let me walk right up and pet her and really likes her chin scratched!  We are going to name her Erica after her grandmother.  I can't wait to show you all my finished truck project!!!  Talk to everyone soon.

Kenny