Our farm name is Conser Run Farm named after the stream that runs through the middle of the farm. We currently raise grass fed Angus cross beef and pasture raised pork for direct sale to the end user. We are always looking for more customers and new friends. If you are interested or have any questions please feel free to ask! Either leave a comment or email us through our social network account.

Sunday, December 29, 2013

No more feeding in the dark!!!

I have had a light at the peak of the barn since I started working on it several years ago.  However, I installed the feed bin for the pig feed a little over a year ago and never gave thought to the fact that it was always dark out there, until the one night when the neighbors security light was off.  Then it was extremely dark because the front light on the barn was burnt out as well!  I decided to add a light on the side where the feed bin is at but needed a new way to switch all the lights on and off for the original barn because once I filled it with hay I couldn't access the switch I installed when I first started remodeling it.


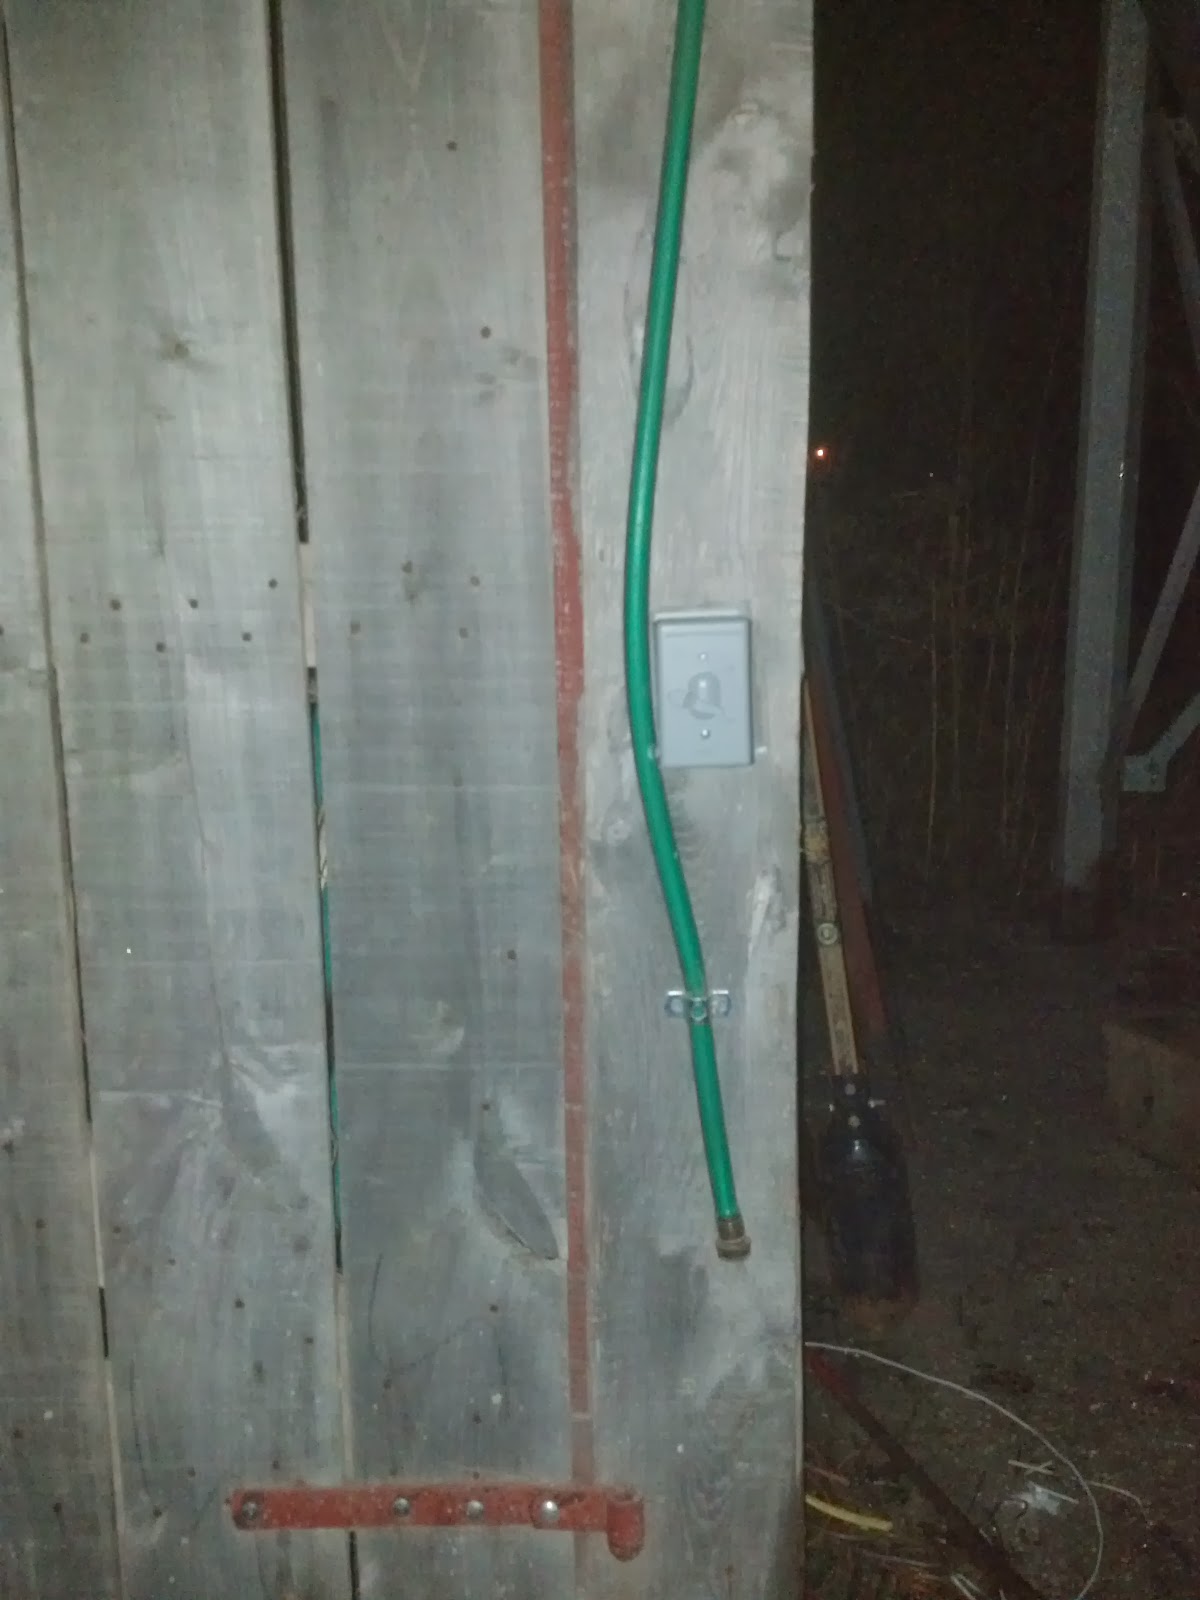
The answer ... put a new weather proof switch on the front of the barn.  Easily accessible while walking to the feed bin and easily accessible when headed into the barn because it is located on the corner of the barn between the man door and the feed bin.  

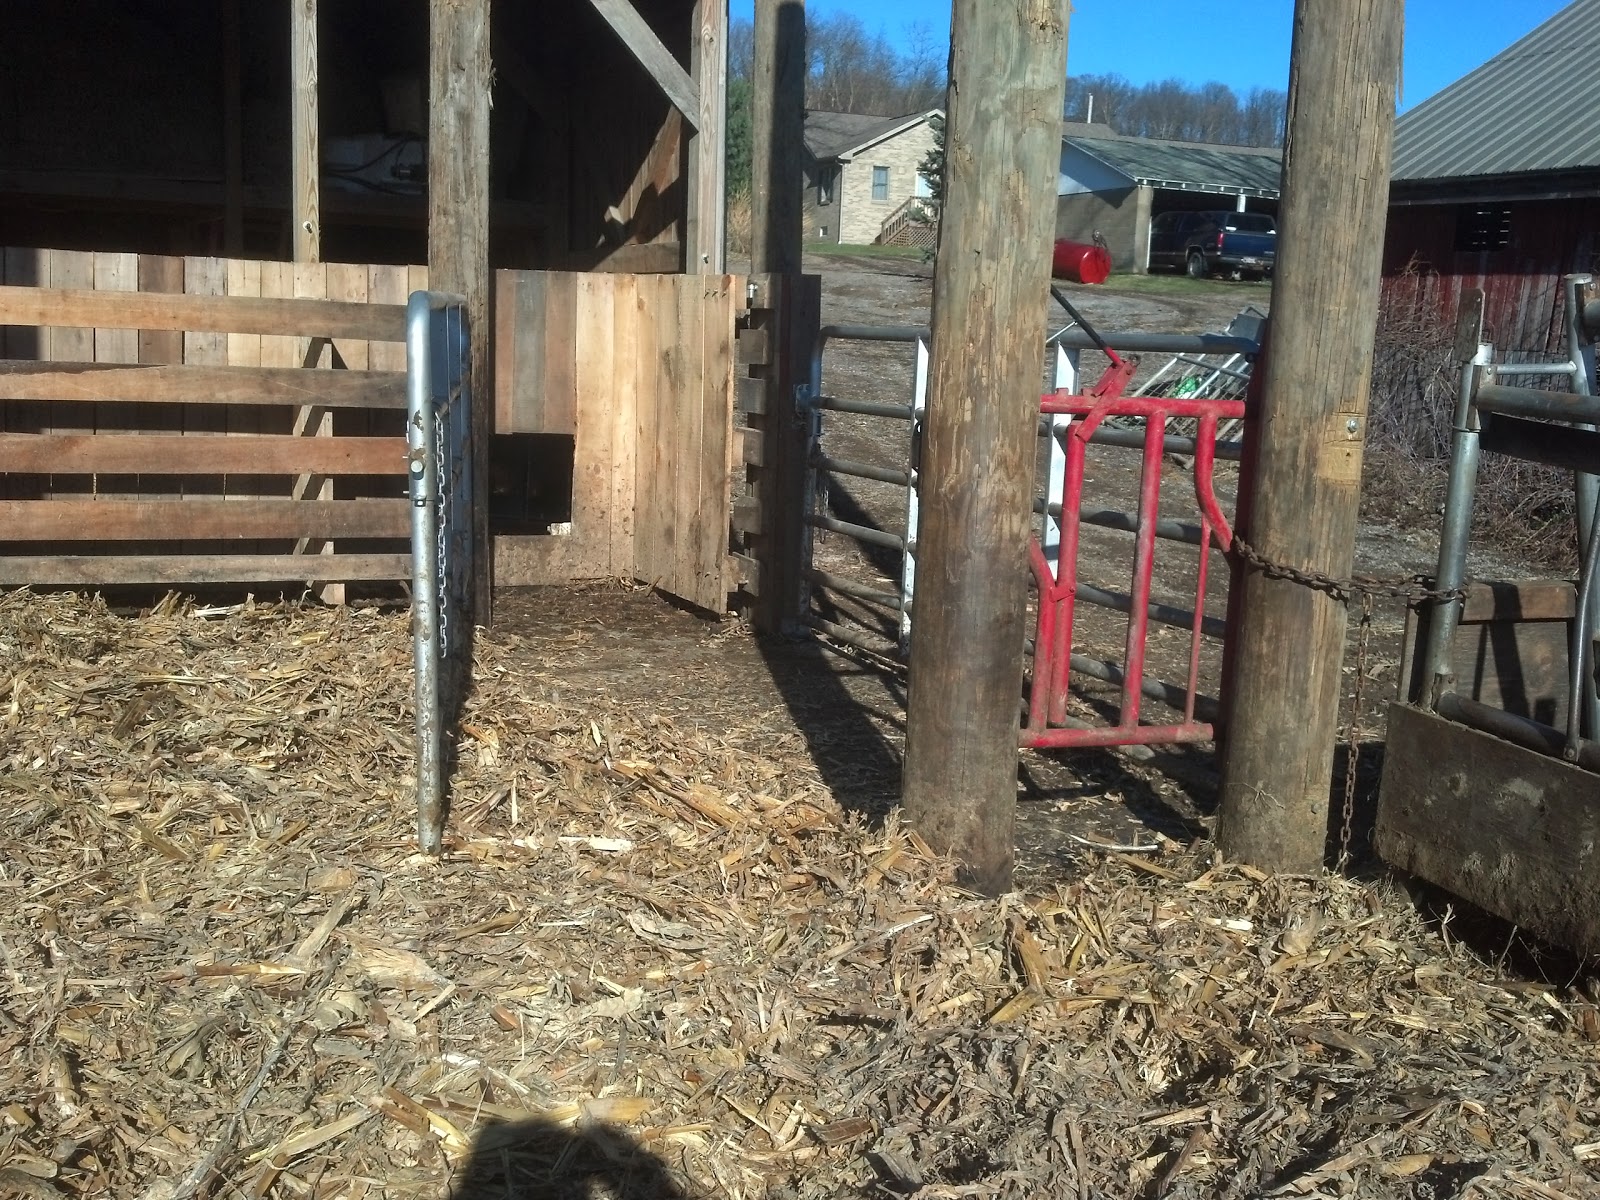
Next step is to reside the barn and put new windows in it where needed.  The existing siding is tongue and groove  boards and has seen many better days.  Not to mention Red Balls, the Boar, ripped a bunch of the siding off the west end of the barn one day while grumpy because he couldn't get to his women when he wanted to!


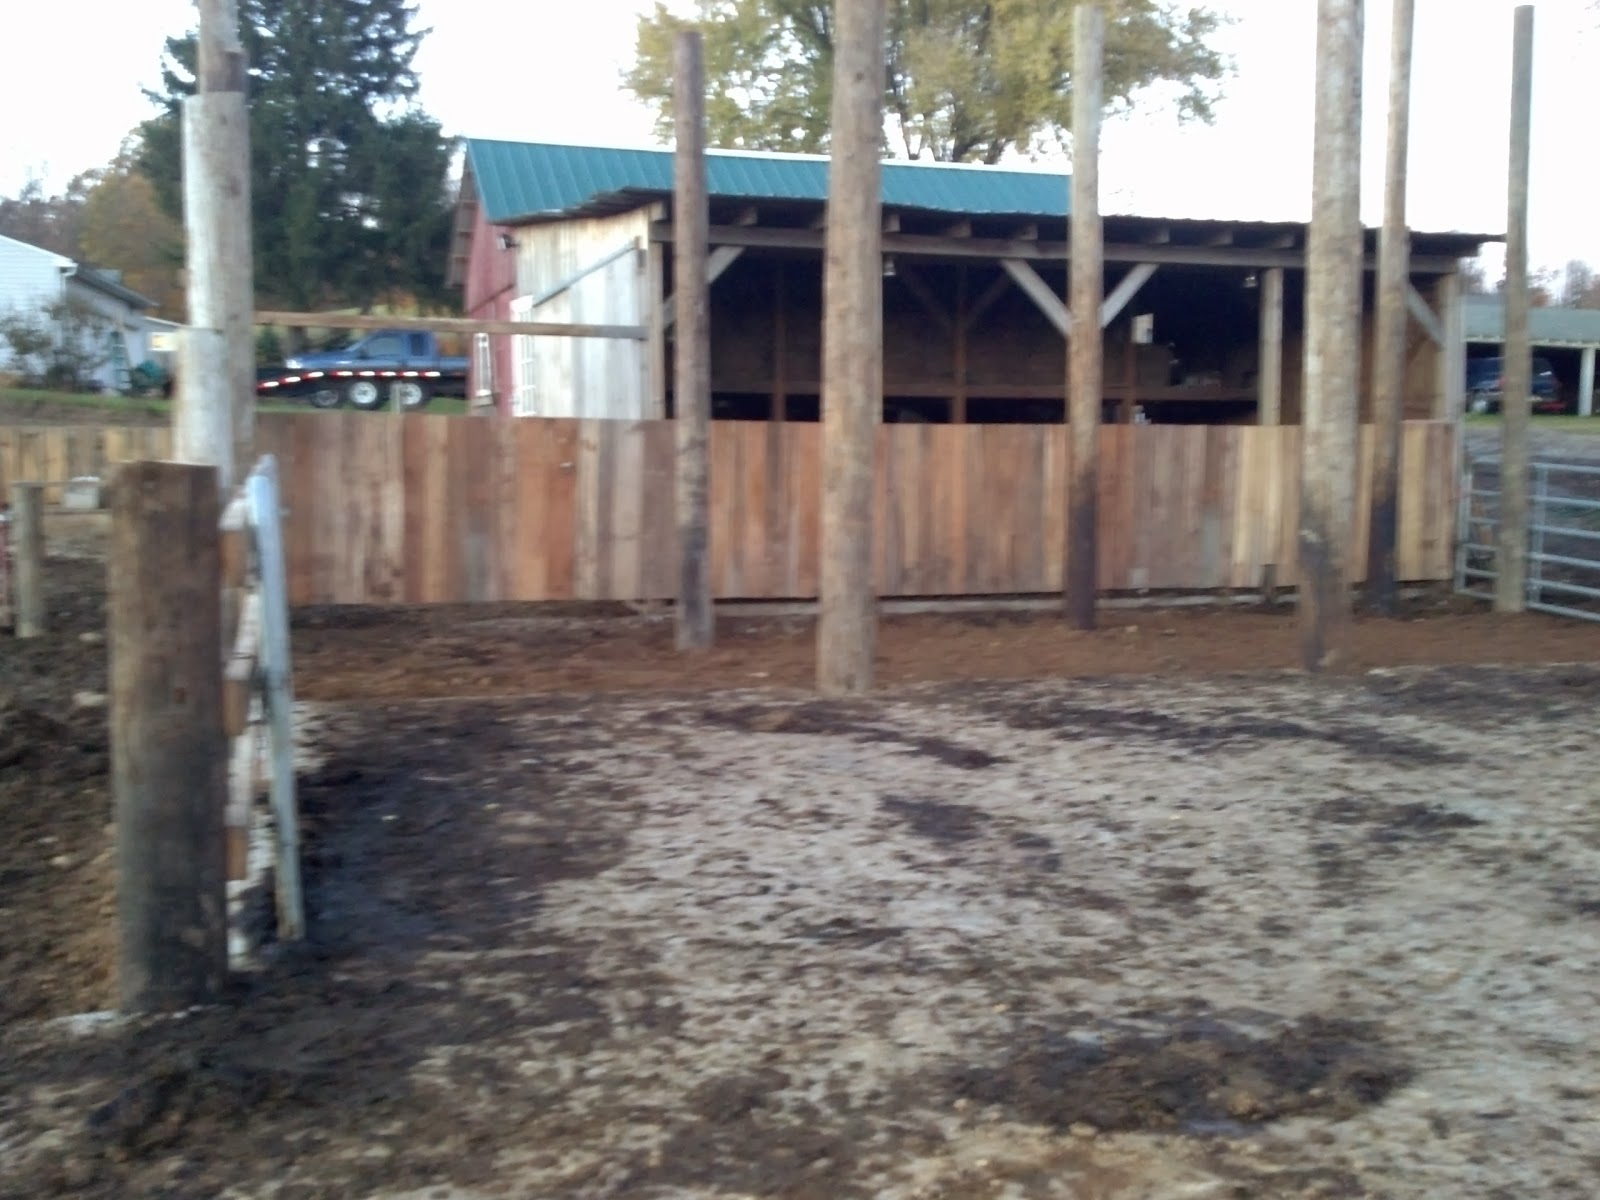
Another addition, all though temporary, was to add a light to the south end of the barn to light up the cow shed area.  Once I get a roof on the shed portion I will add another row of lights to light it all up and move the temporary light to the southernmost portion of the barn to light up the rest of the corral / feeding area.  I took the picture with the light behind one of the pole so you can see what it is lighting up.  I only had one of two bulbs installed in the fixture for the picture since one of them was broken when I removed it from the package.


There are some other wiring items you cannot see in the pictures.  First of all, when I installed the pig waterer a couple of years ago I installed water and electric lines from the house to the waterer.  I also installed a conduit from the pig waterer to the barn to tie it in at a later date.  Today was that later date!  I have a 20 amp circuit that I have been feeding all the electric to the barn with since I started this project.  When I just had lights this was not a problem.  However, with the addition of fans and the feed bin I was pushing my luck.  Every time I would turn on the feed bin the lights would dim.  I have another 20 amp circuit running from the house to the pig waterer.  Today I tied that circuit into the barn and split the wiring in the barn into two sections.  The old barn and feed bin are still on the original circuit from the garage.  The pig shed and cow shed are both now running on the circuit that feeds the pig waterer.

There are two bonuses to the having the pig and cow sheds tied into that circuit is the breaker that monitors that line is a GFIC breaker.  Because it is directly connected to the waterer, which in turn is tied into the water of our house, I wanted it protected against any electrical fault.  It takes very little electric to actual kill an animal or human and this protects that from happening.  The other bonus is that if the shed lights do not turn on I know the breaker tripped.  This would have been helpful earlier this winter when the breaker tripped and the pig waterer froze up because the heater was not working.

Another thing you cannot tell in the pictures is that I have converted all but two lights over to Florescent bulbs from standard incandescent.  This allows me to have room to safely run the heat lamps in the winter for the babies and to run the fans in the summer to cool the barn without having to worry about over loading the system.  It also saves energy and money!  I will convert over one of the two remaining bulbs once I get back to the store.  The final one will not be done for a while because it is a big flood light that I put on the backside of the barn and it lights up a huge area.  I will most likely move it to the south side of the cow shed when I get the roof completed and put the temporary lights I have there now in its place on the west side because I need light more on the south side.  Eventually, down the road a few years, I plan to build a shop down by the barn to keep the tractor in and to work on equipment.  When I do this I will run a new power supply to the new shop and feed the barn off of that supply so I can add a couple of huge floods to light up the pasture around the barn for emergency use if needed.  Plus it would be nice to have the light if I need to load animals at night or when I am wrapping hay in the spring and summer!

Herd check in the morning and I am exhausted.  Plus I need to get up early to feed the cows and pen them in before the vet gets here so I am going to bed early tonight.  Hope it doesn't snow and mess everything up by me having to go to work!

Talk to you tomorrow everyone!

Kenny


Built in cattle chute almost complete and a mini vacation!!!

Last year we started a new family tradition.  Between Christmas and New Years we decided to take the kids for a one night mini vacation to a hotel with a pool.  Last year was a nice break but there was not much for them to do with a normal pool and no hot tub for me!  So this year my wife found an awesome deal in Sandusky Ohio at Maui Sands Resort.  The this picture is the view from our room of the pools.  It was fun and we all had a great time!  Wonderful break to have to try to forget about winter for a little bit.  

Maui Sands Resort
 So, yesterday was my first actual productive day working on my winter break list.  It was also a phenomenally beautiful day!  Bright sun all day with zero clouds, 45 degrees out and no wind.  I got the barn all cleaned and spread on the field and after bedding I went to work on finishing up the gates and stuff to prepare for the herd check on Monday.  Here is a picture from up high looking down on the corral so you can see how it is set up to be able to catch the cows.

I grew up on a dairy farm and one of my first jobs was bringing the cows in to milk.  You can chase a dairy cow any where you want.  I quickly found out after starting to raise beef cows that they are very different from dairy cows in more ways than I thought.  One of the most important is that they will not be chased.  Instead you have to get them to want to go where you want them at.  So, I have gotten very good at getting them to be where I want them when I want them there!

To do this I will start a week or so ahead of time putting the gates how I need them to be able to quickly close them in without them knowing what is going on.  So starting last week I have been keeping the gates where I need them so they get used to them being there.  Then after I finished bedding the corral and putting hay in the feeder I set chained the other big gate to it so that they now have a narrow tunnel to get in and out of the corral.  I will let them eat all the hay today and tomorrow morning early I will put a new bale in the bunk feeder so they will be distracted when I go around the other way to shut the gate for the exit to the corral.

Corral set up to catch the cows for the herd check.  

Once I have them in and penned up I then shut them into the area you see gated in below.  This is the section that leads into the built in chute along the pig shed wall.  After I have some of the cows done and there is not that many left I will shut the cows into a smaller area, and then smaller and smaller until they all go through the chute to the headlock.

Corral showing the gates making a holding pen to send cows through the chute.
 Here is a picture of the headlock with the exit gate open so the cattle can exit after being checked and vaccinated.  Before the headlock was on the pig shed wall and the cows had to stick their heads in the pig pen and then after being checked had to back out of the headlock and turn around to leave.  If you look closely at the top of the headlock you will notice that I added a door spring to the handle.  I was having problems in the past with the latch not catching.  This will make sure that doesn't happen again.  I will take pictures of it from the view of where the vet will be standing so you can see how I have it set up better.  

Built in headlock for the cattle chute.
I also had a chance to take a pic the other day of the area I graded out for a future loafing pad and manure storage pad.  To the left are the pig lots.  To the right is where I am planning on extending the corral fence out so the cows have to come up where I am standing to get to the shed.  This will keep them from eroding the hillside down so I can keep this area flat.  I also plan on creating a buffer strip along the right hand side of this picture on the hill so that any manure runoff or water run off will be caught by the plants there and turned into feed for the animals instead of turning into pollution.  I haven't decided what I am going to grow there yet but whatever it is it will be much better than the mud that I have now! 

In addition to a Manure storage pad I also mentioned a loafing pad.  When the weather is bad and the pasture is pure mud I would like the option of keeping the cows on a concrete pad so that they do not completely destroy the pasture and make more mud.  This would only be after extremely heavy rains or during a thawing period in the early spring where everything is very very wet and muddy.  I doubt I would ever have to pen them up as they usually do not leave the barn area when really muddy other than to get a drink.  So, to make this an option I would also need to install a waterer for the cows to drink from so they can get a drink without going clear to the creek during bad weather.   

Future loafing pad and manure storage.  

Well, hopefully we don't get a lot of rain today.  I would like to work on some wiring in the barn.  I am going to head out and see if I can mark off another item on my list of to do items.  Talk to you all Monday night after the herd check is done!!!

Kenny

Tuesday, December 24, 2013

Happy Holidays and a couple pictures of my BULL DOZER fun!


So, I finally got a few days off from work.  I actually was supposed to have two full weeks but due to snow I am not really getting off what I had scheduled but still any time to get something done at home is good!!!

I decided that since the weather was going to be warm for a few days I wanted to get some grading work done so I rented a small Dozer and brought it home with my newly fixed truck and trailer!


I didn't have time to get a pic today of the area I graded out for future manure storage because I spent most of my day back at work doing snow removal.  I was able to get some pics the other day before the weather went back to snow of just some of the items I did get done.  I started clearing off about 3 acres of ground across the road from the house shortly after purchasing the farm.  I finished my grading work at the barn in about 1/4 the time I thought it would take so I had a lot of left over time to spend with the dozer.  So I decided to go start the final phase of my clearing project.  I had not initially planned on doing this much.  I simply headed over to push up the burn pile and clean up the edges.....and then I didn't stop.....and kept going and going till I had pushed as much as the small dozer would push and then moved on.


These two pictures are from on top of the hill looking down.  This entire area used to be fields.  Then, about 50 years ago the previous owner decided to plant locust trees for use as fence posts.  However, "the best laid plans of mice and men often go awry!"  After some time the trees got out of hand and the entire area became over grown and just useless woods that had no good trees or usefulness as habitat or as production either one.  So I want to take it back to use as a field.  I am keeping the rest of my woods as woodland area.  I am working to control all the invasive grape vines and such while helping the trees I want to grow do better.  I also am trying to conserve habitat for all the flora and fauna that may want to dwell there.


Here is a picture looking up from the bottom.  It was too late in the day to get a good pic because the sun was getting quite low.  Next week I will go up on the top of the hill and take a better picture and get some pics of the other stuff I worked on over the weekend.   I managed to also clean up a bunch of stuff at my dads farm where he lives as well as clear another 4-5 acres of ground on another farm of his that he wants to start farming again.  It is another area that once was cleared more than a century ago and over time got let go and grew back up in junk trees and scrub brush.  Over the next two to three years, depending on how things go, we are hoping to recover another 10 - 15 acres of crop ground as well as get some pasture ground back that he used to use till just after I was born.  Lastly, I also managed to clean up my pasture a little bit on the other side of the creek.  This was just a bunch of junk trees in an old fence row as well as a bunch of junk from the previous owner as well as a lot of trees I cut down in the past but didn't get cleaned up.  I will be having lots and lots of bonfires this coming spring!!!  Looking forward to some great warm nights by the fire drinking beer with some good friends and family!


Before the ground froze back up my buddy brought his play vehicle down to run it around in the corn field for fun.  After a couple of rounds I decided I wanted to test out my new tires on the truck.  I soon found out they do not have quite the bite as my previous set in the sloppy mud but are much cheaper, ride nicer, and still get it in the mud they just need a little more throttle!!  Well, shortly after my buddy Willy and I took to the field, our other buddy Jessie, who came with Willy and is also his house mate, took the play toy out to play some more.  Unbeknownst to him, I snuck up behind him and when we spun into a 360 so did I.  What I didn't know is that he had his drivers side window down!!!!   If you look closely at his forehead you will notice I got him right between the eyes with a big glob of mud....hehehe.  He kept it closed the rest of the day.


I cleaned the barn the other day as well.  I have never really had the cows spend much time up at the barn.  They have always spread out in the pasture.  So I was quite surprised when as soon as I got the barn bedded after cleaning it the cows began laying down all over the new pad and bedding.  I think that they are enjoying it because it is firm and dry compared to the very muddy and wet pasture right now.  Unfortunately, because the roof is not on yet, every time it rains it all falls off the pig shed roof and lands right on the fresh bedding and makes a heck of a mess.  So this nice dry bedding only lasted about two days.  I will clean it again next weekend before the herd check so they are comfy and dry when the vet gets here.

The cows enjoying their fresh corn stubble bedding.
I also managed to get another of the wooden gates built for the cattle chute.  One more and I will be done with that part of the renovation.  There is still one more set of gate hinges to install but they can wait till warm dry weather next year so I can do it right.  I also still have a bunch of posts to install out in the pasture going from the new pad due west along the edge of the newly graded area.  I am hoping it freezes up so I can get in again with the tractor and drill the post holes and get the rails up.  I want to keep the cows from walking over the bank and working the dirt down over the hill.  Hopefully by spring the entire area down hill from the feeding pad / cow shed will be fenced off and I can keep the cows out of the area during muddy weather.  I want to use the area as a filter strip for any runoff from the pad to capture any nutrients that run off due to rain and turn it into a food crop for the cattle and pigs.

If anyone is not busy next week and wants something to do just give me a ring and come on out!  I have plenty to keep you busy.  Hopefully I get it all done soon so I can relax at least one or two days this winter before I start into the spring grind!

As I write this the kids are going nuts watching Santa come on NORAD Santa online.  I remember as a kid when my only update was from the 6pm news and 11pm news.  If you saw the 11pm report that meant your barn work wasn't done quick enough and you better be getting to bed quickly!!

I hope everyone has a joyous holiday season, whatever you celebrate and however you celebrate it!  The main thing is to spend time with all your loved ones when ever you can cause you never know when they may not be here to do so again.  Also, for anyone who gets upset about having to work on a holiday or about traffic or whatever is bothering you.  Remember that you will always find someone who has much worse problems or has to work much more that day, or may not even have the option to be upset about missing some of the day with their family because they cannot come home at all.

Happy Holidays everyone.  I will be sure to get up my annual New Years Post next week!

Kenny


Thursday, December 12, 2013

Some more cool project pics from work!!


We are trying to wrap up some of our big projects before the winter is fully set in.  Some of the things we can do at this time of year include planting trees.  I have been working for a customer who also happens to be a neighbor of mine.  He wanted a screening planting to block the view of houses in the valley and to create a natural area for deer and other wildlife to congregate.  I am hoping to add some other trees to the planting later this winter like fruit trees and such for food!


Here is another view from back at the cabin looking south toward the valley.


We added some beautiful river birch to screen the building that houses snow making equipment.


We finally have a complete fire pit.  It includes a natural gas log starter in the bottom for very easy camp fires very similar to the one I have here at home but much larger.  The pit doesn't look that big in this photo because there is no real frame of reference.


Here is a picture with the gas on.  If you look closely at the pic above you will see some smoldering logs.  I turned the gas on so you can see how much flame it gives off.  Pretty awesome!  I also had my daughter get in the photo for a size reference.  The fire pit is 10 feet outside diameter.  All the stones to build it were hand chiseled just like the back patio and the patio around the pit.  Next year when everything is finished I will add some more photos with the green grass showing.


Have a great day everyone!   Hope you like the pics.  Would love to build this for you!

Kenny

Early morning wake up call that wasn't snow related!!

I haven't really had much of a problem with the cows getting out.  Pigs, at least once a year they manage to find a weak spot but not the cows.  This morning I had a guy covering me for snow at work as I need to wrap up a planting project during the day.  So I was jolted out of my much needed rest at 4:30 am to the sound of the dog barking because someone rang the door bell......what?  So I go out to find the neighbor at our door and she tells me that when she went out to start her car for work there were cows and pigs everywhere!!!

Sure enough, everyone was out.  So the wife and I headed down after dressing for the 10 degree weather outside.  I started calling the pigs and got some milk for them while my wife went out around the neighbors house to see if she could get them to head back to the barn.  Within about 5 minutes the pigs realized I had milk and came running back.  A few of the cows followed including Fifty, the matriarch of the herd.  I chased her in the barn with the pigs.  After getting her in she mooed a couple of times and the rest of the herd came running back to the barn and in the gate!!!!   It was never this easy when I was a kid to get the cows back in when they got out!

So, the question is, how did they get out!?  Well, apparently someone was scratching or rubbing on the new gate that is the outside of the headlock.  It has a quick latch on the post and a special pin that is bolted to the end of the gate.  Well, from all the pushing they twisted the pin and the gate simply flew open and away they all went.  I will need to get some heavier bolts on these pins as it simply clamps on and if they turn this easy they will need to be tighter and I may even need to weld them on.  In the mean time and for the rest of the future this gate will be backed up with a chain just like all the others!

Sigh......I just have another day or two of work to finish up and I don't see that happening for at least another week.....Gonna be a long cold cold winter!  But at least for now everyone is back where they are supposed to be!

Kenny

Sunday, December 8, 2013

Thanksgiving dinner and some other pics

I have not had the time to post very much lately.  With the short days and cold weather I am constantly busy trying to get ahead and haven't had a chance to stop and relax yet.  I was out early this morning to check lots from the last snow event and as I type this I am watching the next oncoming snow storm on my other monitor. Hopefully my vacation at the end of the month for Christmas and New Years will include a day or two to stop and reflect on the year that has already passed.  It is going to be a long cold winter.

My thanksgiving week started with the largest snow storm of the year for us here.  We got up to 8" of snow depending on where you were at in this area.  I ended up putting in 70hours at work from Monday morning till Thursday afternoon right before dinner.  I also went in for a few hours on Friday to wrap up paperwork.

My reward waiting for me with dinner was my trusty friend Coors!  Had a couple with a long hot shower and the rest with dinner.  


This was our first family dinner at my parents house since they finished the new kitchen.  It is beautiful and it was awesome to have lots of space to have the whole family together for a meal.  I only got one picture of the food and festivities due to me falling asleep within minutes of finishing my meal.  We also got to eat a heritage breed turkey raised by one of my customers that buys piglets off of me.  It was delicious.  I can't wait till he raises another batch!  If anyone is interested let me know and I will have him raise more next time to sell.

Thanksgiving Dinner in my parents new kitchen

Even though there is no roof on the cow shed yet the cows and pigs are still enjoying the pad and the fact that when the weather is bad they have a firm place to get out of the mud!

Frosty and her calf.  She is an Angus x Shorthorn and the calf's father is Angus x Charolais

The star of this picture is Frosty, the black cow laying down, and her son standing to her left.  He is one good looking little dude!  They were chilling out by the barn after getting a belly full of hay.  The larger tan steer standing up and the one laying down are both this years beef crop.  I cannot wait to see how they produce.  These will be the first steers from Thunders genetics.  I know they are growing well just anxious to see what the meat looks like and how well they finish out.

Frosty and her calf.  She is an Angus x Shorthorn and the calf's father is Angus x Charolais
I recently found one of my dad's steers in the small pasture across the creek.  He is one that likes to jump the fences and I couldn't get him to go back home so I had to put him in with my cows and then used my new gate and chute system to catch him and take him back to where he belongs.

The built in cattle chute for the new cow shed.
 As you can see in the picture above there was no gate to keep the cows from just leaving the barn.  I had to finish the chute during my only break on Sunday afternoon so I could use it.  I had mounted the rail boards one day last weekend but hadn't had time to build any of the gates.  I managed to build the first of 4 wooden gates and got it mounted with just enough time to get him caught and take the kids to get the Christmas tree.  By the time I got back home and was able to get a picture it was dark so this is from inside the chute looking out of the shed.

The new wooden gate I built for the cow shed / chute.
While I was building the new gate I also had to install the new opening for the feeder pigs to get in and out of the one pen so I could separate them from the sows.  The sows are due to have babies at the end of the month and I still have one that is not fattening up enough.  If she doesn't put on enough weight before the babies are born she will thin out to quickly and will not be able to feed them milk as long as she needs to.


The new entrance/exit for the feeder pigs.
I kept all the boards that I trims off to make a door to put on it when I want it closed.  It is also sized so that just the feeder pigs can get through it.  The sows, boar, donkey, and calves are all too big to fit through the hole.  The feeder pigs will just barely be able to fit through it when they are finished and ready for the butcher.

Steven was back home for a couple of days this week.  Before he headed out again he helped me clean the pig barn and the cow shed.  They were both very messy and needed a cleaned and re-bedded.  Because of the new concrete pad I was able to save all the manure from the cows and pigs.  I only lost a little from all the extra water from the rain and snow.  I had 5 large loads in my neighbors tandem manure spreader.  That would be equivalent to about 8-9 loads in my dad's box spreader.  With the old gravel pad I might have had three or four loads in my dad's spreader.  I am planning on installing a buffer strip from where I store the round bales across the hill almost to the property line fence to capture any of the manure that washes off the pad.  I haven't figured it completely out but I want to utilize every ounce of this free fertilizer and not let any of it turn into runoff!

After all of the stuff was done last weekend we headed to our favorite spot to get a Christmas tree.  When I was a kid it seamed to take forever for everyone to decide what tree they wanted.  We are usually very quick to find the one we like.  It usually takes us longer to climb up the hill than it does to pick the one we want.  Even Daisy gets in on the action!
Everyone happy to have the Christmas Tree.
We had three days of very warm weather, in relation to the frigid cold and snow we have been having the last two weeks.  To utilize the break in the weather we hurried to finish what we could at work before the snow set in again.  

Below are a set of steps that I had cut for the pool project I was working on for the last half of the year.  These are cut from White Mountain slabs in Scranton PA.
White mountain step slabs.
They laid in almost perfect.  Just needed a slight adjustment of the patio stone on the top patio leading up to the steps.  I also needed to chisel off the tip of the one rock to the right.  Otherwise it was a very easy installation.

I hope everyone who celebrates thanksgiving had a wonderful one!  If you have never experienced one you should not pass up the experience if it ever presents itself.  It is always wonderful to get the entire family together and have a great meal and spend time with each other.  It doesn't happen as often as it should so you have to enjoy it when it does!


Tuesday, December 3, 2013

First snow storm of the year.

Sorry I haven't posted in a couple weeks.  Been pretty hectic here trying to get ready for winter.  Work has been crazy and then we got a huge snow fall right before thanksgiving.  Haven't had a break yet because as soon as I got done with snow and work stuff I had to dive right back into the barn to keep it moving along.

I will definitely get some pictures up later this week or next weekend so everyone can see what I have been up to lately!

Talk to you all soon!

Kenny

Sunday, November 17, 2013

Barn Updates and Patio/Steps project update!


Well, we got the back patio grouted in with maroon colored grout.  It looks awesome!  

West Mountain Lay down patio with maroon grout
 Here is a shot of the patio from the south end showing most of it.


I was also very excited to get my steps in for the front doors of the clients house.  All six of these step slabs were cut from the same large boulder about the size of my truck.  The largest being 9' x 5' for the bottom step and the smallest/top step was 5' x 1.5'.  

Here is a picture of all the steps just after I unloaded from the truck.  I had been up all night watching for snow and salting parking lots and then put in a full day on the job site.  I was only going to work a half a day and go home and sleep till I saw the steps and then I just couldn't leave till I put them in place.

West mountain step slabs from single boulder
 After being stacked up here is what they look like.  We had a concrete isolation pad already installed so they will not be effected by frost heaving so installation was quite easy.  We have a new vacuum lifting tool that we can pick them up with so we just vacuumed them with it and swung them in place with the excavator!

Here are the steps on the right front door.  The top surface of every stone was flamed to take away all the saw marks and give is a very lightly textured look.  It also brings out the color of the stone a lot!

West Mountain flamed cut slabs installed.
 The homeowner was looking for something different and unique that no one else would have.  Every one of these steps came from the same rock and yet even amongst them they are quite different so they are very unique!

These are the left front steps.  We had to add on to deal with a greater grade change on this side of the house.

West Mountain flamed cut slabs installed
To deal with a large grade change from the back of the house to the front we installed steps up the slope from similar slabs that were made for a couple of large boulders that they sawed up to make us step slabs out of.  They are phenomenal!! 

Here is a shot looking down the steps.  There is then a little landing pad/walkway that turns the corner to the front steps.
West Mountain flamed cut slab steps
I then added two more steps with a larger landing area/step made from three of the slab steps to make a stoop at the bottom of the front steps.  We will be adding the same lay down material as we used on the paths and back patio to the area between the step slabs and the main steps.

West Mountain flamed step slabs with landing.

That was my busy week on the job site along with a planting a semi load of 25' dawn redwoods and dealing with a bunch of rain followed by a bunch of snow.

While dealing with all of the chaos on the job site I also was able to get the rest of the concrete for the barns poured and all the gates mounted and feeders put back in place!
My daughter Lisa Merrick posing for a picture next to the new concrete!
I do not yet have a good picture of all the gates installed.  I will take one when I finish building the cattle chute.  I picked up a bunch more much needed supplies at the store today to aid in completing the shed.  A few of the items are more lights and wiring boxes to add some lights for the cow shed.  Once these are installed I will be able to work after dark, which is 5 pm at this time of year!  Here is a picture of the built in headlock for the cows.  This will make life so much easier when performing herd checks.   At least once a year we have to vaccinate, worm, and pregnancy check all the cattle.  To do this safely for us and the cattle we need to restrain them for a couple of minutes each.  The entire shed / loafing pad can be converted into a corral / cattle chute with the simple swinging of a couple of gates.   Once all the cows are in the corral I shut the main gate, swing two others into place and then the only way out is through the chute.  I am hoping to have everything but the roof completed by next weekend so I can start training the cattle.

Once or twice a week I am going to set the stage and shut them in and go through the process with them going down the chute to leave.  This will get them used to it so when the time comes for the herd check they will be calm and everything will hopefully go smoothly.

Once I get everything completed but before putting the roof on I will get on top of the pig shed roof and take a picture of the entire thing from above so you can see how it all works.  It took me a lot of thinking and planning and trial and error to get it right and it is as close as I can get it now.  Can't wait to use it!

Homemade cattle chute headlock built into the barn
Hope everyone has a great week!  Sorry for the long times between posts but things have been so hectic I haven't been able to keep up.  I think I am going to start posting quick pics from the phone for more updates!

Goodnight everyone!

Kenny

Sunday, November 10, 2013

Sunday, November 3, 2013

Barn project update and a new patio I am working on.

Well, in my last post I had some pictures of the new feeding area/corral that I had installed.  Over the last couple of weeks I have been working from dawn to dusk between my day job and here to keep things moving in both places.  I managed to take the old cow shed completely down in a couple of hours with no trouble at all.  I then built out the pig shed wall that is the new wall for the outside of the pig pens.  This wall also doubles as the one side of the new built in cattle chute that is going in the new cow shed.  I also extended the cow shed another ten feet past the end of the pig shed to allow for more space.

The poles set for the new cow shed
 This is a pic from the pig lot end of the new cow shed.  I spent last weekend working on this portion of the project.  If you look closely you will notice there is a wooden height restriction entrance between the gate and the new barn wall.  This is adjustable and will be great in keeping the cows and the donkey out of the pig barn or keeping pigs separated based on size.  

Height restricted opening for pig lot.
  Here is a shot looking into the new shed from the creek side of the pad.  There is going to be a built in cattle chute at the back of the shed.  I also spaced all the posts so I can make up to three box stall pens so that I can keep someone in the barn if I need to.  I can also use this setup with an added size restriction opening to feed the feeder pigs once the sows start having babies in the winter.  I cannot wait to get this all finished!  This winter will be so much easier and better for the animals and for the farm.

Pic of the new cow shed posts installed and ready for concrete.
This is a patio I am working on at work.  A great customer of mine wanted something different and I found that on my trip to the quarry in Pennsylvania last month.  This stone is quite thick and we have been hand chiseling every piece to tweak them to get them to fit.  It has taken almost two weeks to get it done and we are almost there.  We have some other areas to use some more on this project.   More pics to come!

West mountain lay down stone patio

I will talk to you all soon with more pics!

Kenny

Monday, October 21, 2013

Rebuilding the cow shed!!!! Finally a four year dream coming to fruition!!

 Well, another couple of very very busy weeks have gone by.  I have been busting butt trying to get things around the barn done for winter.  I got a new feeder to feed the cattle but quickly realized without a concrete pad to feed them on they would be standing in the mud all winter long.  So, I borrowed a post hold digger and got to work.  I first set all the posts for the new corral/feeding area.  Then, 65 tons of gravel and 200 tons of soil later I had the area leveled enough for concrete.


I had Ray Pucci who owns Accent Concrete in Greentown Ohio pouring the pad for me.  He does a lot of work on projects where I work during the day and does a really nice job.  I had everything close so I fixed the guys lunch while they set forms and then we tweaked the grades and poured the pad.


We were a little short for what I wanted to do but the pad turned out great!  I wanted an apron on the left side of the pic for the feeder to set on but we will get it on the next pour.  After I get the new shed posts set we will pour the rest of the concrete and be set for winter!


Sunday was my first full day of for the last several weeks so I started early with stuff in the house and then headed out to get things set up for letting the cows onto the new pad.  I first mounted the main gate....and I was happy to find I finally got it right and it is level and stays where I put it instead of just swinging one way or the other when you unchain it!


I got my feeder reset in its proper location and had to block it up to level it for the time being.  By this time I was ahead of where I thought I would be and I knew I needed to take the old shed down to finish the wall on the end of the pig shed that will be part of the new cattle chute/loading chute that will be built into the barn.  So, I pulled all the screws and extra anchor bolts out that I put into the shed many many years ago to hold it together out so I could push it over and take it apart. 


Two hours later the shed was gone.  I saved all the metal off of the roof to use on the new roofs for the feeders and I managed to save about $50 worth of screws and two long 2"x6"x 12' boards! 


Here is a pic of the shed gone.  I managed to finish the rest of the wall on the side of the pig shed tonight.  I have having my construction guy come tomorrow to help lay out the posts that I need and how they will be set up so I can get the posts and get them set.  Once they are set we will be able to pour the rest of the concrete!!

I am so excited.  This will change many things here on the farm.  Herd checks will be phenomenally easier with the new chute and headlock system allowing us to check the cattle and vaccinate with much much less stress on the cattle and us.  I will also be able to sort the cattle out that I need to catch by myself with zero stress on the cows just like I can currently do with the pigs.  Another very important but much over looked thing will be the ability to contain the manure from the cattle and be able to clean the barn easier without losing the valuable fertilizer that I need for the fields!

I eventually will have a manure storage pad to the direct west of the corral area once I get enough money to pay off the work I am currently doing now.  Also if you look at the second pic from the bottom you will see the south board fence of the corral.  I am going to extend this as far west as I can to be able to put in a set of gates away from the corral area so I can funnel the cattle in when I need to catch someone quickly rather than chasing them and stressing them out. 

I was excited coming into this year because I knew that we were turning a big corner in where we are headed.  This is proof of this and what keeps driving me every night after work to keep pushing onward and getting to the next step.  This setup will allow me to go from handling 12 cattle to being able to handle 50 with out any changes.  If I want to be able to handle more I can simply add on to the current area and set it up for up to 100 cattle.....that will be way down the road, but I have to think ahead!

Have a great day everyone!

Kenny