Our farm name is Conser Run Farm named after the stream that runs through the middle of the farm. We currently raise grass fed Angus cross beef and pasture raised pork for direct sale to the end user. We are always looking for more customers and new friends. If you are interested or have any questions please feel free to ask! Either leave a comment or email us through our social network account.

Sunday, December 8, 2013

Thanksgiving dinner and some other pics

I have not had the time to post very much lately.  With the short days and cold weather I am constantly busy trying to get ahead and haven't had a chance to stop and relax yet.  I was out early this morning to check lots from the last snow event and as I type this I am watching the next oncoming snow storm on my other monitor. Hopefully my vacation at the end of the month for Christmas and New Years will include a day or two to stop and reflect on the year that has already passed.  It is going to be a long cold winter.

My thanksgiving week started with the largest snow storm of the year for us here.  We got up to 8" of snow depending on where you were at in this area.  I ended up putting in 70hours at work from Monday morning till Thursday afternoon right before dinner.  I also went in for a few hours on Friday to wrap up paperwork.

My reward waiting for me with dinner was my trusty friend Coors!  Had a couple with a long hot shower and the rest with dinner.  


This was our first family dinner at my parents house since they finished the new kitchen.  It is beautiful and it was awesome to have lots of space to have the whole family together for a meal.  I only got one picture of the food and festivities due to me falling asleep within minutes of finishing my meal.  We also got to eat a heritage breed turkey raised by one of my customers that buys piglets off of me.  It was delicious.  I can't wait till he raises another batch!  If anyone is interested let me know and I will have him raise more next time to sell.

Thanksgiving Dinner in my parents new kitchen

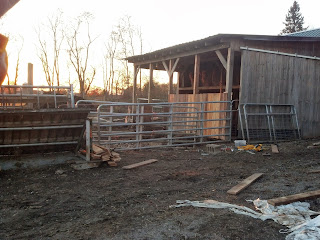
Even though there is no roof on the cow shed yet the cows and pigs are still enjoying the pad and the fact that when the weather is bad they have a firm place to get out of the mud!

Frosty and her calf.  She is an Angus x Shorthorn and the calf's father is Angus x Charolais

The star of this picture is Frosty, the black cow laying down, and her son standing to her left.  He is one good looking little dude!  They were chilling out by the barn after getting a belly full of hay.  The larger tan steer standing up and the one laying down are both this years beef crop.  I cannot wait to see how they produce.  These will be the first steers from Thunders genetics.  I know they are growing well just anxious to see what the meat looks like and how well they finish out.

Frosty and her calf.  She is an Angus x Shorthorn and the calf's father is Angus x Charolais
I recently found one of my dad's steers in the small pasture across the creek.  He is one that likes to jump the fences and I couldn't get him to go back home so I had to put him in with my cows and then used my new gate and chute system to catch him and take him back to where he belongs.

The built in cattle chute for the new cow shed.
 As you can see in the picture above there was no gate to keep the cows from just leaving the barn.  I had to finish the chute during my only break on Sunday afternoon so I could use it.  I had mounted the rail boards one day last weekend but hadn't had time to build any of the gates.  I managed to build the first of 4 wooden gates and got it mounted with just enough time to get him caught and take the kids to get the Christmas tree.  By the time I got back home and was able to get a picture it was dark so this is from inside the chute looking out of the shed.

The new wooden gate I built for the cow shed / chute.
While I was building the new gate I also had to install the new opening for the feeder pigs to get in and out of the one pen so I could separate them from the sows.  The sows are due to have babies at the end of the month and I still have one that is not fattening up enough.  If she doesn't put on enough weight before the babies are born she will thin out to quickly and will not be able to feed them milk as long as she needs to.


The new entrance/exit for the feeder pigs.
I kept all the boards that I trims off to make a door to put on it when I want it closed.  It is also sized so that just the feeder pigs can get through it.  The sows, boar, donkey, and calves are all too big to fit through the hole.  The feeder pigs will just barely be able to fit through it when they are finished and ready for the butcher.

Steven was back home for a couple of days this week.  Before he headed out again he helped me clean the pig barn and the cow shed.  They were both very messy and needed a cleaned and re-bedded.  Because of the new concrete pad I was able to save all the manure from the cows and pigs.  I only lost a little from all the extra water from the rain and snow.  I had 5 large loads in my neighbors tandem manure spreader.  That would be equivalent to about 8-9 loads in my dad's box spreader.  With the old gravel pad I might have had three or four loads in my dad's spreader.  I am planning on installing a buffer strip from where I store the round bales across the hill almost to the property line fence to capture any of the manure that washes off the pad.  I haven't figured it completely out but I want to utilize every ounce of this free fertilizer and not let any of it turn into runoff!

After all of the stuff was done last weekend we headed to our favorite spot to get a Christmas tree.  When I was a kid it seamed to take forever for everyone to decide what tree they wanted.  We are usually very quick to find the one we like.  It usually takes us longer to climb up the hill than it does to pick the one we want.  Even Daisy gets in on the action!
Everyone happy to have the Christmas Tree.
We had three days of very warm weather, in relation to the frigid cold and snow we have been having the last two weeks.  To utilize the break in the weather we hurried to finish what we could at work before the snow set in again.  

Below are a set of steps that I had cut for the pool project I was working on for the last half of the year.  These are cut from White Mountain slabs in Scranton PA.
White mountain step slabs.
They laid in almost perfect.  Just needed a slight adjustment of the patio stone on the top patio leading up to the steps.  I also needed to chisel off the tip of the one rock to the right.  Otherwise it was a very easy installation.

I hope everyone who celebrates thanksgiving had a wonderful one!  If you have never experienced one you should not pass up the experience if it ever presents itself.  It is always wonderful to get the entire family together and have a great meal and spend time with each other.  It doesn't happen as often as it should so you have to enjoy it when it does!


Tuesday, December 3, 2013

First snow storm of the year.

Sorry I haven't posted in a couple weeks.  Been pretty hectic here trying to get ready for winter.  Work has been crazy and then we got a huge snow fall right before thanksgiving.  Haven't had a break yet because as soon as I got done with snow and work stuff I had to dive right back into the barn to keep it moving along.

I will definitely get some pictures up later this week or next weekend so everyone can see what I have been up to lately!

Talk to you all soon!

Kenny

Sunday, November 17, 2013

Barn Updates and Patio/Steps project update!


Well, we got the back patio grouted in with maroon colored grout.  It looks awesome!  

West Mountain Lay down patio with maroon grout
 Here is a shot of the patio from the south end showing most of it.


I was also very excited to get my steps in for the front doors of the clients house.  All six of these step slabs were cut from the same large boulder about the size of my truck.  The largest being 9' x 5' for the bottom step and the smallest/top step was 5' x 1.5'.  

Here is a picture of all the steps just after I unloaded from the truck.  I had been up all night watching for snow and salting parking lots and then put in a full day on the job site.  I was only going to work a half a day and go home and sleep till I saw the steps and then I just couldn't leave till I put them in place.

West mountain step slabs from single boulder
 After being stacked up here is what they look like.  We had a concrete isolation pad already installed so they will not be effected by frost heaving so installation was quite easy.  We have a new vacuum lifting tool that we can pick them up with so we just vacuumed them with it and swung them in place with the excavator!

Here are the steps on the right front door.  The top surface of every stone was flamed to take away all the saw marks and give is a very lightly textured look.  It also brings out the color of the stone a lot!

West Mountain flamed cut slabs installed.
 The homeowner was looking for something different and unique that no one else would have.  Every one of these steps came from the same rock and yet even amongst them they are quite different so they are very unique!

These are the left front steps.  We had to add on to deal with a greater grade change on this side of the house.

West Mountain flamed cut slabs installed
To deal with a large grade change from the back of the house to the front we installed steps up the slope from similar slabs that were made for a couple of large boulders that they sawed up to make us step slabs out of.  They are phenomenal!! 

Here is a shot looking down the steps.  There is then a little landing pad/walkway that turns the corner to the front steps.
West Mountain flamed cut slab steps
I then added two more steps with a larger landing area/step made from three of the slab steps to make a stoop at the bottom of the front steps.  We will be adding the same lay down material as we used on the paths and back patio to the area between the step slabs and the main steps.

West Mountain flamed step slabs with landing.

That was my busy week on the job site along with a planting a semi load of 25' dawn redwoods and dealing with a bunch of rain followed by a bunch of snow.

While dealing with all of the chaos on the job site I also was able to get the rest of the concrete for the barns poured and all the gates mounted and feeders put back in place!
My daughter Lisa Merrick posing for a picture next to the new concrete!
I do not yet have a good picture of all the gates installed.  I will take one when I finish building the cattle chute.  I picked up a bunch more much needed supplies at the store today to aid in completing the shed.  A few of the items are more lights and wiring boxes to add some lights for the cow shed.  Once these are installed I will be able to work after dark, which is 5 pm at this time of year!  Here is a picture of the built in headlock for the cows.  This will make life so much easier when performing herd checks.   At least once a year we have to vaccinate, worm, and pregnancy check all the cattle.  To do this safely for us and the cattle we need to restrain them for a couple of minutes each.  The entire shed / loafing pad can be converted into a corral / cattle chute with the simple swinging of a couple of gates.   Once all the cows are in the corral I shut the main gate, swing two others into place and then the only way out is through the chute.  I am hoping to have everything but the roof completed by next weekend so I can start training the cattle.

Once or twice a week I am going to set the stage and shut them in and go through the process with them going down the chute to leave.  This will get them used to it so when the time comes for the herd check they will be calm and everything will hopefully go smoothly.

Once I get everything completed but before putting the roof on I will get on top of the pig shed roof and take a picture of the entire thing from above so you can see how it all works.  It took me a lot of thinking and planning and trial and error to get it right and it is as close as I can get it now.  Can't wait to use it!

Homemade cattle chute headlock built into the barn
Hope everyone has a great week!  Sorry for the long times between posts but things have been so hectic I haven't been able to keep up.  I think I am going to start posting quick pics from the phone for more updates!

Goodnight everyone!

Kenny

Sunday, November 10, 2013

Sunday, November 3, 2013

Barn project update and a new patio I am working on.

Well, in my last post I had some pictures of the new feeding area/corral that I had installed.  Over the last couple of weeks I have been working from dawn to dusk between my day job and here to keep things moving in both places.  I managed to take the old cow shed completely down in a couple of hours with no trouble at all.  I then built out the pig shed wall that is the new wall for the outside of the pig pens.  This wall also doubles as the one side of the new built in cattle chute that is going in the new cow shed.  I also extended the cow shed another ten feet past the end of the pig shed to allow for more space.

The poles set for the new cow shed
 This is a pic from the pig lot end of the new cow shed.  I spent last weekend working on this portion of the project.  If you look closely you will notice there is a wooden height restriction entrance between the gate and the new barn wall.  This is adjustable and will be great in keeping the cows and the donkey out of the pig barn or keeping pigs separated based on size.  

Height restricted opening for pig lot.
  Here is a shot looking into the new shed from the creek side of the pad.  There is going to be a built in cattle chute at the back of the shed.  I also spaced all the posts so I can make up to three box stall pens so that I can keep someone in the barn if I need to.  I can also use this setup with an added size restriction opening to feed the feeder pigs once the sows start having babies in the winter.  I cannot wait to get this all finished!  This winter will be so much easier and better for the animals and for the farm.

Pic of the new cow shed posts installed and ready for concrete.
This is a patio I am working on at work.  A great customer of mine wanted something different and I found that on my trip to the quarry in Pennsylvania last month.  This stone is quite thick and we have been hand chiseling every piece to tweak them to get them to fit.  It has taken almost two weeks to get it done and we are almost there.  We have some other areas to use some more on this project.   More pics to come!

West mountain lay down stone patio

I will talk to you all soon with more pics!

Kenny

Monday, October 21, 2013

Rebuilding the cow shed!!!! Finally a four year dream coming to fruition!!

 Well, another couple of very very busy weeks have gone by.  I have been busting butt trying to get things around the barn done for winter.  I got a new feeder to feed the cattle but quickly realized without a concrete pad to feed them on they would be standing in the mud all winter long.  So, I borrowed a post hold digger and got to work.  I first set all the posts for the new corral/feeding area.  Then, 65 tons of gravel and 200 tons of soil later I had the area leveled enough for concrete.


I had Ray Pucci who owns Accent Concrete in Greentown Ohio pouring the pad for me.  He does a lot of work on projects where I work during the day and does a really nice job.  I had everything close so I fixed the guys lunch while they set forms and then we tweaked the grades and poured the pad.


We were a little short for what I wanted to do but the pad turned out great!  I wanted an apron on the left side of the pic for the feeder to set on but we will get it on the next pour.  After I get the new shed posts set we will pour the rest of the concrete and be set for winter!


Sunday was my first full day of for the last several weeks so I started early with stuff in the house and then headed out to get things set up for letting the cows onto the new pad.  I first mounted the main gate....and I was happy to find I finally got it right and it is level and stays where I put it instead of just swinging one way or the other when you unchain it!


I got my feeder reset in its proper location and had to block it up to level it for the time being.  By this time I was ahead of where I thought I would be and I knew I needed to take the old shed down to finish the wall on the end of the pig shed that will be part of the new cattle chute/loading chute that will be built into the barn.  So, I pulled all the screws and extra anchor bolts out that I put into the shed many many years ago to hold it together out so I could push it over and take it apart. 


Two hours later the shed was gone.  I saved all the metal off of the roof to use on the new roofs for the feeders and I managed to save about $50 worth of screws and two long 2"x6"x 12' boards! 


Here is a pic of the shed gone.  I managed to finish the rest of the wall on the side of the pig shed tonight.  I have having my construction guy come tomorrow to help lay out the posts that I need and how they will be set up so I can get the posts and get them set.  Once they are set we will be able to pour the rest of the concrete!!

I am so excited.  This will change many things here on the farm.  Herd checks will be phenomenally easier with the new chute and headlock system allowing us to check the cattle and vaccinate with much much less stress on the cattle and us.  I will also be able to sort the cattle out that I need to catch by myself with zero stress on the cows just like I can currently do with the pigs.  Another very important but much over looked thing will be the ability to contain the manure from the cattle and be able to clean the barn easier without losing the valuable fertilizer that I need for the fields!

I eventually will have a manure storage pad to the direct west of the corral area once I get enough money to pay off the work I am currently doing now.  Also if you look at the second pic from the bottom you will see the south board fence of the corral.  I am going to extend this as far west as I can to be able to put in a set of gates away from the corral area so I can funnel the cattle in when I need to catch someone quickly rather than chasing them and stressing them out. 

I was excited coming into this year because I knew that we were turning a big corner in where we are headed.  This is proof of this and what keeps driving me every night after work to keep pushing onward and getting to the next step.  This setup will allow me to go from handling 12 cattle to being able to handle 50 with out any changes.  If I want to be able to handle more I can simply add on to the current area and set it up for up to 100 cattle.....that will be way down the road, but I have to think ahead!

Have a great day everyone!

Kenny

Sunday, October 6, 2013

A trip to a new stone quarry and some farm projects.

I finally have a few minutes to sit down and put up a new post.  I always think that the next week will be calmer and things will slow down and then BAM, a whole bunch of stuff comes up and I am running all over again!

I got the opportunity to tour a stone quarry in Scranton PA this past week.  I found some new materials that until the last few years were not available.  This quarry is producing some of the most beautiful cut to pattern stone and irregular stone I have ever seen in my life!

The graining in these stones are amazing!  I am so ready to build a patio here at home out of this material.....if only it were free I would start tomorrow!!!

West Mountain Stone
Here are some other pallets of material ready to be shipped.  If I had a truck with me I would have brought a few pallets home!  Good thing I was driving a prius....I could only brings four small pieces of stone back.

West Mountain Stone
I got a chance to see their new saw shop they are almost ready to fire up.  This is one of their medium size saws.  It has a 10' blade on it.  They have three or four other bigger ones that are 11'6" and can cut up to 5' thick.  They also have a cnc water jet table that can cut through up to 2' thick material.


One of the West Mountain Seams that they get the really colorful rock out of.  They have to drill holes through the slab and then use cone shaped expanders to pop them out.  Then they cut them to order.

West Mountain Stone seam
Some of the natural edge stone cut and flamed to give a level surface that is not slippery and really makes the color explode!

West Mountain Stone Irregular slabs
This is the also pretty awesome.  Because they have such huge saws they are able to cut boulders the size of my truck into slabs.  So, if you want matching natural edge steps, tables, benches, etc., you can pick a boulder out and have it cut.

West Mountain Stone step and bench slabs
Some more slab material.  I probably looked like a little kid running around on top of all these rocks taking pictures.  However, I have not been this excited about new material since I set my first toprock 10 years ago!!!
West Mountain Stone with some White Mountain in the slab
Another beautiful slab.  I couldn't walk any where without seeing something I liked!

West Mountain Stone
If you want to know more about it simply email me at ken.r.merrick@gmail.com and I will get you more information.  The quarry name is Scranton Materials LLC.  They sell mostly to contractors and distributors.

West Mountain Stone
Now, on to the reality of the farm!  I was finally able to get my new feeder for the cows.  I now have too many cows for the one feeder that I have.  So I put in an order with my father to get them in one load and it came in a couple weeks earlier than expected.  I got them both from Klene Pipe Structures.  They have some awesome feeder and great prices.  I took pictures of both feeders in use to show the difference.  They both have 8 actual feeding holes for the cattle to eat from.  However, the new one is square and the calves can access the bale from the ends while the cows can comfortably eat four to a side.  There are also slotted panels inside the feeder that lay against the bale so the cows cannot pull large amounts of hay out onto the ground.  It is a C-7 hay saver feeder.  You can find it on their website at http://www.klenepipe.com/.  They have many many more options!

http://www.klenepipe.com Hay saver feeder c-7

As you can see in the picture below, even thought there are 8 holes in the bunk feeder there are only 6 cows eating.  This is due to the cows being wider than the holes and they argue over who is gonna eat first.  Now that I have two feeders I am already noticing a difference in growth of my steers.  Normally when I take them off the pastures and they go onto just bales the steers stop growing as fast because of limited access to the feed.  Now they are actually growing faster because almost everyone can eat at the same time without fighting for it!

http://www.klenepipe.com  Bunk Cattle Feeder bk-6
I have Kiko Custom Construction coming soon to help me rebuild the cattle shed and put roofs on both feeders.  This will help me save even more hay during wet weather and help the wood in the feeders last much much longer!

I also wanted to show a picture of our feeder piglets having a special treat.  My buddy Steven is travelling to different cattle shows clipping and showing cattle for people.  One of the by products of this is leftover milk from milking them while at the show.  So, at the last show he put about 150 gallons of milk in barrels and brought it home for the piggies.  They love it!!  They are gonna be huge by the time January rolls around to get them in to the butcher!  YUM YUM!!!!
Our berkshire x tamworth cross piglets eating milk.
I also spent one of my evenings a week or so ago rebuilding the Boar's Nest.  We tore it all apart to put the new barn wall in last spring and I never got it back together.  I also wasn't happy with the temporary OSB panels that we used for all the walls.  It doesn't last if it gets wet and the pigs were just eating it off the walls. The boar had also shoved the main sill plate almost completely off the foundation on the wall to the left.  So I beat it back into place and then rebuilt the walls and put rough sawed 1" boards up on the walls.  They will not be tearing that up any time soon!

The left side wall that I had to rebuild.  So much stronger now than it was before!


Well, I am headed out to enjoy the nice weather before the rain hits.  I may go get the auger and set some posts in the cow pasture for the new pen.  My wife is canning tomatoes and making beef jerky and the house smells wonderful!

Talk to you all soon!